The Den of Slack

emilymorganti.com

Page 8 of 234

Cassidy Creations kits bashed into kitchen cabinets

When I started reading Nutshell News magazines in the 1990s, some of my favorite articles were the ones that showed how to bash furniture kits into something other than what they were supposed to be. In my quest to furnish the Mansard Victorian (almost) exclusively with Cassidy Creations and Bauder-Pine furniture, I’ll do the same to make kitchen cabinets.

This is a Bauder-Pine kitchen cupboard that was recently listed on eBay. The same cupboard was available from Cassidy Creations in kit form, and I got my hands on two of them to use them on either side of the stove.

Here are the pieces in one cupboard kit — base cabinet on the left and upper cabinet on the right.

For some reason the top and bottom pieces of the base cabinet only had holes drilled to hinge one door. Both of my cupboard kits were like this.

I added my own holes to the other corners.

Next I stained the interior pieces, using a Red Oak Minwax stain pen.

Then I assembled the first base cabinet.

And the doors and drawers.

At this point I put the partially built cabinet aside for several months. Now that the kitchen floor is done, I’m ready to build the rest.

My plan had been to put the stove, cupboards, and the refrigerator all along the back wall.

Continue reading

Checkerboard floor continued

Continuing with the checkerboard floor. I’m not sure what these white smudges are on a few of the tiles.

But they were easily covered up with black Sharpie.

Can’t even see the touch-ups!

I didn’t take a picture of this, but in covering up a white spot right on the edge of one black tile, I smudged Sharpie on the white tile next to it. Attempting to wipe it off didn’t work.

It was it the middle of other tiles that had already been glued down, so I couldn’t easily remove the it, but my weird vinyl tiles came to the rescue! I was able to peel up *just* the vinyl layer, and then glue down another vinyl piece on top of it. Crisis averted.

When I got to the transition to the bump-out addition, I needed to add a strip of cardboard to make the floor level.


Then I used a paper template to figure out where to cut the tile that goes around the corner.


Here’s how it looks.

Continue reading

Checkerboard kitchen floor in half scale

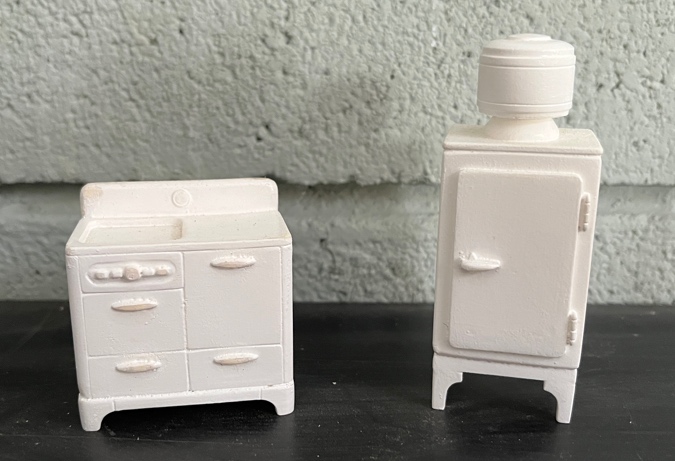
In my quest to furnish the Mansard Victorian (almost) entirely with Bauder-Pine and Cassidy Creations furniture, I plan to use these Cassidy Creations appliances in the kitchen.

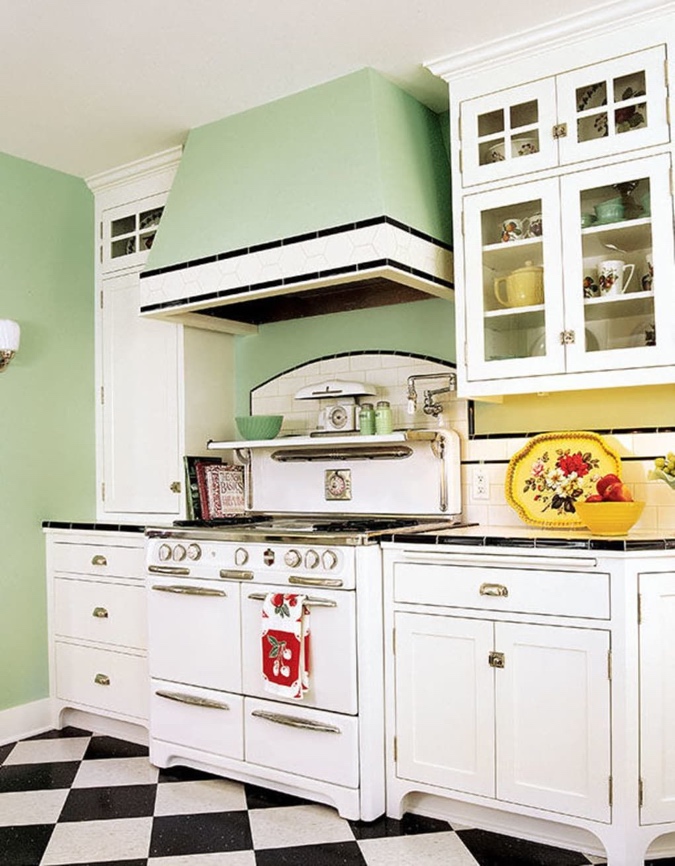
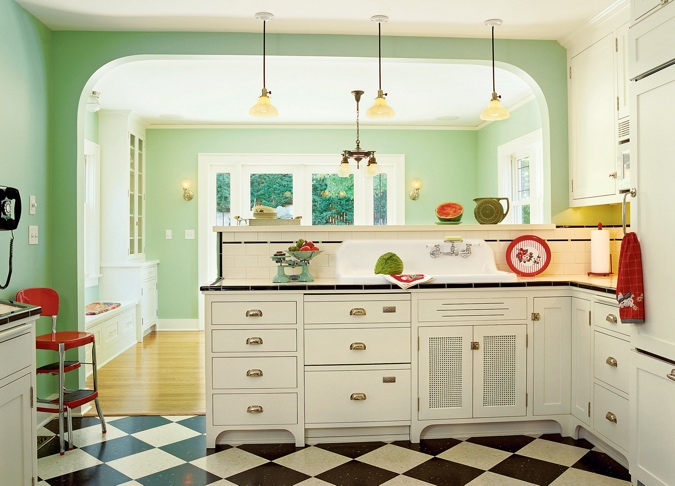
When I first started thinking about this room — around a year ago, probably — I googled “1920s kitchen” and these pictures are the first two that turned up. (Photo source.) This is a modern kitchen renovated to look old, and it’s super cute.

In fact, I think I found these pictures around the same time I decided to match the light green paint of the Bauder-Pine furniture and use it for trim throughout the house.

So that’s what I want to emulate in the Mansard Victorian’s kitchen, starting with the floor. I could have looked for a checkerboard floor or printed something out, but where’s the fun in that?

In the Victorianna, I made a kitchen backsplash out of tiny squares of scrapbook paper cut with a paper punch. I applied Crystal Clear Gallery Glass paint to each tile to give it shine and texture. (Read about it here.)

I liked how that turned out — so much that I did it again in the bathroom — but when I tested it out with larger squares to make floor tiles, it didn’t work as well. So I went to Michaels a couple weekends ago hoping to find something that would look tile-like without the Gallery Glass.

Continue reading

« Older posts Newer posts »

© 2024 The Den of Slack

Theme by Anders NorenUp ↑