May 2015: I started the Westville as part of a Greenleaf community build in 2005, and at the time we blogged our progress on the Greenleaf forum. After a few site upgrades the old community blog has become hard to link to and I’m redoing my website anyway, so I decided to move those posts over here and backdate them. Sorry for any weirdness that results!
I got held up on the Westville because I bought a piece of plywood a few weeks ago, to make walls out of, and then didn’t get a chance to cut it. We had visitors for two weekends in a row so I only just made it to the hangar with my wood yesterday. Geoff helped me cut it down to size with his radial arm saw.
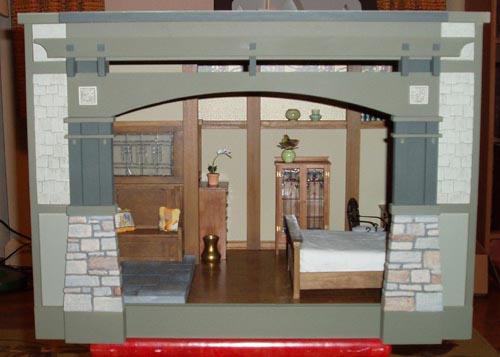
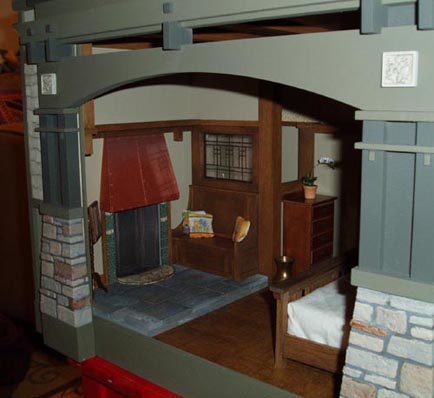
So, I now have a wall for the living room (to go up against the stairs) and also for the bedroom (to block the stair hole from the room).
Here’s what it looks like upstairs:
There will be another piece of wood at the back of the stair hole (Geoff cut it yesterday but it’s too wide right now). This will make the stairs self-contained, just like they are in many real houses. As you can see in the second picture, I am going to add a closet door to the far end of the wall in the bedroom, and the little space behind the stairs will be the closet. My parents were visiting last weekend and pointed out that once the roof is on, it’ll be hard to see the closet. So I am going to add a dormer to the bedroom roof. I was thinking of using this one, but it’s for a 45-degree roof and Judith tells me the Westville’s roof is 55 degrees. (I bought a protractor last week to check myself, but haven’t taken it out of the bag yet!) I suppose if that dormer won’t work, I can make my own out of scrap wood.
Continue reading


 Emily is a freelance writer, miniaturist, and adventure game enthusiast.

