The Den of Slack

emilymorganti.com

Page 32 of 235

Screened-in porch — paint & stain

After last week’s post, a couple of people tipped me off to a project in Nutshell News that looked suspiciously like the screened porch kit I’m building. I tracked it down in the August 1988 issue. The article is called Grandma’s Back Porch, and it’s a 1:12 project based on a class Ron Clanton used to teach in his shop.

Here’s a photo from the article:

Ron Clanton was based in Salt Lake City, so I assume my kit from Daffodil Miniatures & Gifts, also in Salt Lake City, was made in collaboration with him. It’s strange, though, that he isn’t credited in the instructions.

(As an aside, Ron Clanton was also at one point the owner of Victorian Times, the company started by Clell Boyce and known for impressive Victorian dollhouses like the Joseph Angel house and the Lacamas Lake House. Both of those were available in half scale [but are very rare!] and I would love to find them someday. I didn’t bid on a half scale Joseph Angel house on eBay several years ago and regretted it afterward. For more info on Victorian Times, check out their catalogue and this post on the Greenleaf forum.)

Back to my screened-in porch. I’m matching the colors of my Infinite Possibilities Porch so the two vignettes will look like they belong to the same house. I painted the front porch with Glidden paint samples. The house color is Pearl Gray, the front door and shutters are Antique Purple, and the dark blue trim is Stormy Night.

Since the dark blue was the dominant trim color on the front porch, I decided to use this for the walls of the screen porch, and save the purple for the doors.

The porch floor and shingles are stained with Minwax water based gray that I bought for $1 off the oops cart at Home Depot and have used for numerous projects (most recently, the Victorianna’s shingles).

The kit came with a small bag of shingles. Since there weren’t that many of them, I started out painting each one. When that got too tedious (it didn’t take long!), I ended up dumping them all in a cup of stain.


I put on gloves, fished the shingles out of the stain cup, and blotted them off on a paper towel.

I also stained the porch floor, the steps, and the roof. (I stained the roof just in case any of it showed through under the shingles. It never does, but the one time I don’t do this will be the time I wish I had!)

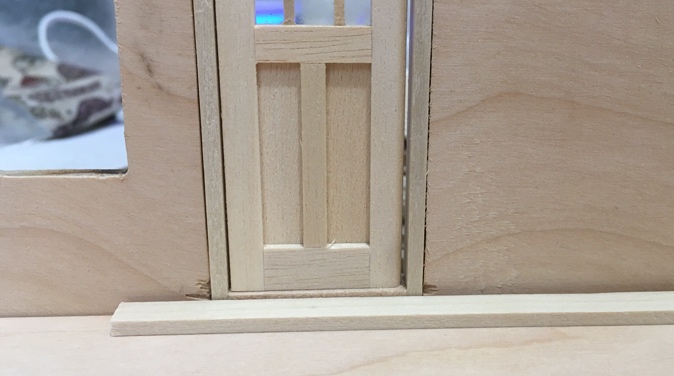
I painted the back door purple with dark blue trim, like on the front porch.

Then I held the purple door up against the screen porch walls to decide whether I should paint the screen door purple as well. Seeing this, I decided against it — these seem like they should match.

The instructions said to spray the screen door with “sealer or lacquer” to prevent warping. I wasn’t sure what that meant, but I tried spraying it with Krylon matte finish since that’s what I had.

It seems to have done the trick. The door did curl slightly when I painted the first side, but then I painted the other side and it flattened out again.

Once the shingles were dry, I drew lines 5/16″ apart on the roof and started shingling. I counted the shingles beforehand and thought I would have just enough.

A few rows in, I realized my shingles weren’t flush with the sides of the roof — each row was ending slightly farther out, creating a bowed look. It happened on the other side of the roof too. I guess I just wasn’t being careful.

I put a sharp blade on my utility knife, flipped over the roof, and sliced off the edges of shingles that were sticking out until the shingles were flush with the side of the roof. I’ll have to go over these edges with stain, but at least they edges look nice and straight now.

This is how far I got with the shingles that came in the kit. Looking at the instructions, I now see that they say to draw the shingle lines 1/2″ apart. That explains why I ran out of shingles, but it seems like an awfully big gap between rows for 1:24 scale. Luckily I have plenty more shingles like these, so I just have to stain a few more.

Here’s how it’s looking. My next tasks will be to add the screen material and hinge the screen door.


Screened-in back porch vignette

I recently bought a 1920s Back Porch Kit from a miniaturist who was clearing out her stash. This kit was made by Daffodil Miniatures & Gifts in Salt Lake City. I don’t think the company is around anymore, and the instructions don’t have a year on them so I don’t know how old this kit is.

The kit had been advertised as “partially assembled,” but the person I bought it from removed it from the original box to reduce the shipping cost, so the kit was packed in a ziploc bag when it arrived with a lot of loose pieces.

Judging from the directions, I think what I received was *less* assembled than what would have come in the original kit — particularly the walls and the roof — but I don’t know if that’s because the original builder took it apart make it flat for shipping or if the pieces had broken before that.

Either way, it took me a while to figure out how everything fit together. The instructions have a few black and white assembly pictures, but there’s no good photo of the final product. Luckily all the pieces are here, and I was able to tell from the dots of dried glue what was supposed to go where.


Several years ago I built a Houseworks front porch kit. The back porch faces the opposite direction, so I decided to finish it with the same colors as if the two porches are on the same house.

Once I figured out how the back porch fit together, the first steps were to finish the bricks and the base under the porch while they could still be accessed.

Continue reading

A lava lamp and a bulletin board

For a while, I’ve been searching for a 1:12 scale lava lamp to put in Sam & Max’s office.

I found several options that could work, if only they were still available. American Girl used to have a line of 1:12 AG Mini furniture and accessories that included a lava lamp that lit up. I also came across a necklace from Hot Topic, a cell phone charm made by Mathmos (which also sells life-sized lava lamps), and a super pricey charm from Juicy Couture.

I’d almost given up when I decided to try “lava lamp toy” on eBay and landed on this hideous thing.

This is a 6″ action figure, which makes him 1:12 scale. The lava lamp is a little large — it’s 2″ tall (the equivalent of 24″) and a standard lava lamp is only 16.3″ tall. But after searching high and low, I didn’t think I’d find anything better. And the lava’s even the right color!

But the base and cap were not the right color. I used my Molotow Liquid Chrome marker to color the black parts silver. This is the best silver pen ever — it really looks like metal.

Next I tackled the bulletin board.

Continue reading

« Older posts Newer posts »

© 2025 The Den of Slack

Theme by Anders NorenUp ↑