
These are two half scale Bill Lankford cottages I bought separately off eBay. The one on the left is officially called “A Place for All Seasons” because it came with two bases, summer and winter, that could be swapped out. (Mine only came with the summer base.) The one on the right is fully enclosed and the roof lifts off to see the inside. They both need some repairs and new landscaping, and the insides are unfinished. Since most of the tasks will be the same for both houses, and they’re small, I decided to tackle them together.
Before I even knew what it was, I dubbed the Place for All Seasons house the Tudor Cottage, so that’s how I’ll be referring to it on the blog. I bought this dollhouse thinking it was made by Bauder Pine because an eBay auction for another one (in much better shape) said so. Then I came across the Spring 1994 issue of Miniature Collector, with this house on the cover, and the magazine credited the house to Bill Lankford. I contacted Bill for more details and he said that the house was once taught in a class at the Philadelphia Miniaturia sponsored by Pat Bauder, but the house is entirely his.

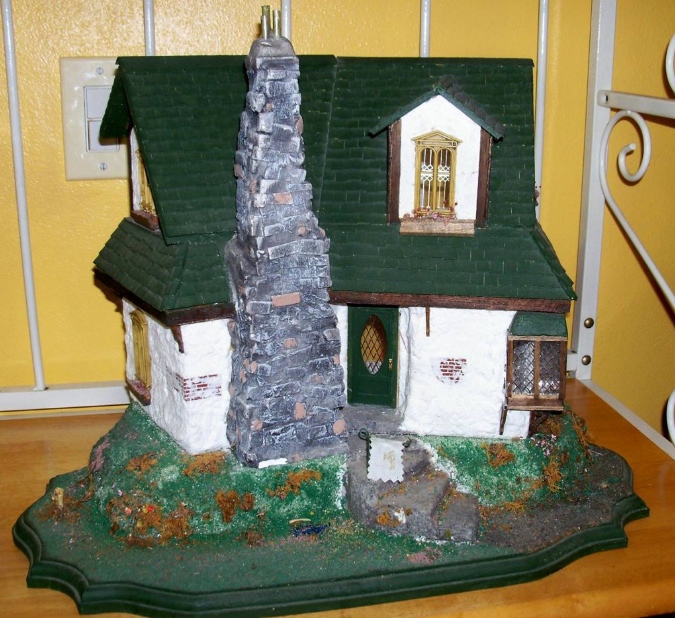
Here’s how the Tudor looked when I bought it. It may be the exact same structure, but mine isn’t nearly as nice as the one in the magazine. (Not yet, anyway!)
As soon as I unpacked the house I started pulling it apart. I popped out all the windows (one of which had been completely painted over inside), the door, the window boxes, and the bay window thingie. I’m going to replace the glass and make a new door. The bay window was poorly glued in, I can do a better job.

Inside, I’ll add texture to the walls, repaint, and add flooring and trim. I’ll build in an egg carton stone fireplace where the hole is, something like the fireplace in my Little House cabin, but more ornate.

The house isn’t in bad shape, but a lot of things are just sloppy — no paint under the roof, for example. One side of the dormer in the roof is unpainted, too. And the chimney, which seems to be cast in resin, is totally unfinished. It looks like the previous owner started trying to paint it and stopped when they realized they weren’t doing it right.

Besides the one shown in the Miniature Collector article, I’ve found a couple other instances of this dollhouse online, one at LiveAuctioneers and one on eBay finished by Pat Bauder. (I don’t know how long that eBay link will continue to work, since the auction is long over, but for now all the images are still hosted here.) I also saw one a couple of years back at the CHAMPS show in El Cerrito, CA.
Continue reading


 Emily is a freelance writer, miniaturist, and adventure game enthusiast.

