The Den of Slack

emilymorganti.com

Page 125 of 232

Rowhouse kitchen from a kit

When I first started working on the rowhouse last fall, I bought a modern kitchen kit from SDK Miniatures with the plan of bashing it a bit. Here were my early ideas. I started working on the kit today.

The cabinets are made from wooden boxes with trim pieces laid on the fronts to give the illusion of cabinet doors and drawers. This means the doors and drawers don’t open, which is fine with me!

Here’s the basic layout. The L-shaped counter is exactly how it comes in the kit — no bashing there. But the tall piece on the left originally had three segments – an oven/microwave unit, a pantry, and a tall and skinny fridge that I didn’t like. I removed the fridge portion.

Instead, I’ll use a magnet fridge (but i might try painting it “stainless”…)

Since the L-shaped cabinet is going together as designed, I breezed through its assembly pretty quickly today. I painted them with a Behr color named “Tuscan Beige” which is essentially off-white.

The kit is designed to have decorative paper placed behind the trim piece. I’d been planning to use this wallpaper from Itsy Bitsy Mini. It looked neat in theory.

But I didn’t like it in practice. I think the decorative paper is a neat idea and it would work well in a shabby chic house, but maybe a little too kitchy for my Victorian.

Instead, I painted the cabinet base with the same Olivewood paint I’m using for exterior trim.

I like the idea of this but am not totally sold on it yet. I feel like the white part should be wider, or the doors should have some sort of detail, or something. Might still play around with it.

Continue reading

Rowhouse – railings and a light in the stairwell

With the wallpaper, floors, and trim in the stair rooms finished, the time has come to finish the stairs. I started on the second floor, which is complicated by the fact that I wanted to hang a light down from the underside of the landing.

I used a round file to make a groove in the top side of the landing. This is to hide the wire.

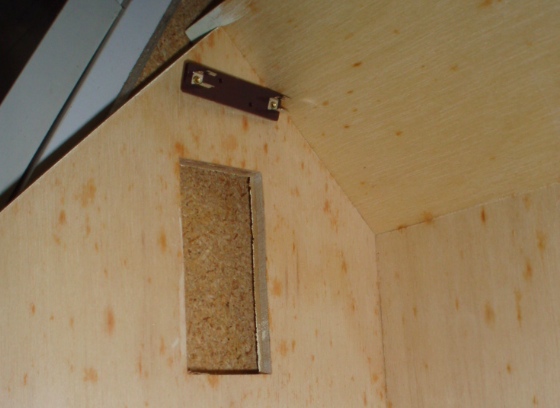
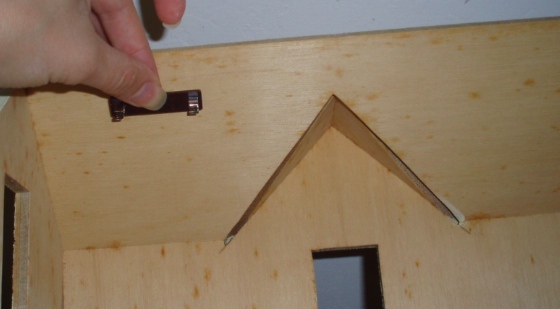
Then I drilled a hole through the landing, attached the hanging light underneath, and threaded the wire through the hole. With the tread in place it looks like this.

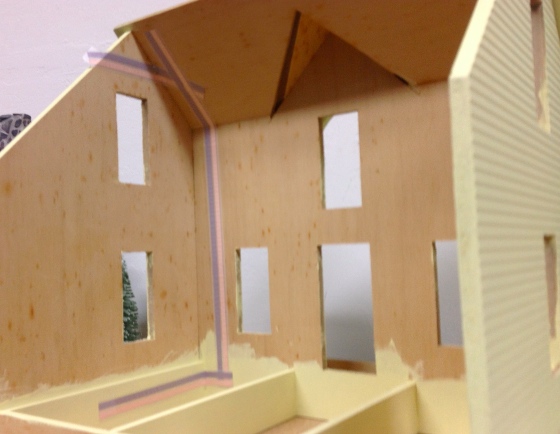
To drill a hole in the wall for the wire to go through, I carefully measured and marked it on the opposite side, using an extra long drill bit.

The wire comes out the side of the landing and goes through the hole in the wall. With the stairs in place the landing butts right up against the hole, so you don’t see the wire at all.

Continue reading

Little House cabin – final touches

I last worked on the Little House cabin back in November, and that’s when I started writing this blog post. But I thought “finishing” the house was imminent, so I wanted to wait until I had some more pictures, and seven months went by. Oops. Anyway, the house might not be 100% finished, but yesterday I put together a few last furniture kits. If a house is ever truly done, this is as close as it’s going to get.

The last thing I did in November before getting distracted by rowhouse electricity was build a shelf for plates next to the fireplace. I couldn’t find illustrations in the Little House books that showed how plates and pots etc. were stored, so I made this up as I went along. I made the shelf out of skinny stick scraps.

They’re held together by log scraps.

I glued the shelf to the wall above the utensil rack.

And here’s how it looks in use. Included on the shelf are two “tin” cups I bought off eBay, that look sort of like Laura’s and Mary’s tin cups in the books, and various other dishes Ma can use for cooking.

Continue reading

« Older posts Newer posts »

© 2024 The Den of Slack

Theme by Anders NorenUp ↑