May 2015: I started the Arthur as part of a Greenleaf community build in 2005, and at the time we blogged our progress on the Greenleaf forum. After a few site upgrades the old community blog has become hard to link to and I’m redoing my website anyway, so I decided to move those posts over here and backdate them. Sorry for any weirdness that results!
On Tuesday night I managed to get the rest of the siding off. The last stubborn bits came up after I doused them with a vinegar / water mixture. I don’t know if the vinegar helped at all to loosen the glue or if it was just the water, but in any case, I was able to loosen the last bits of trim and rip them off. The downside is, the house smelled like vinegar. The wood also turned an awful black color where the vinegar and water touched, but no worries, since that will be covered up.

I had to sand away the remaining glue and wood scraps before I could get on with the house. I tried doing it by hand but it was making a lot of noise and I didn’t want to disturb our neighbors, who share a wall with our house. So the Arthur sat that way until today (Saturday). I think it was a little mad at me for leaving it in such a state of disarray… I could feel it scowling. Geoff was going to the hangar today so I decided to pack the Arthur into the car and go with him. I’m much more likely to work on a house for a long stretch if I’m working there with him, because there’s nothing like the internet to distract me!
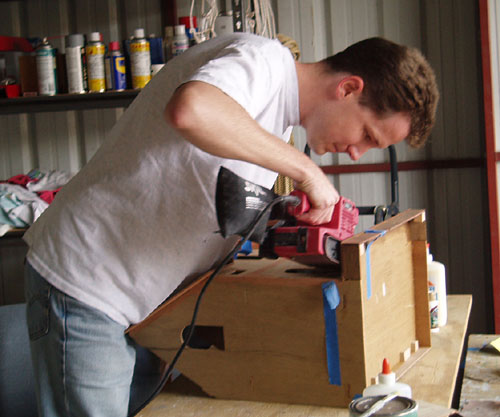
I showed him the mess I made with the siding and asked his advice on smoothing it out. I was planning to use the dremel tool but he had a better idea… the belt sander! Power tools scare me, so I let him do the honors.

Looks scary, but the house wasn’t damaged at all!
The belt sander was the perfect tool for the job. You can hardly tell the wood went through a trauma. There were a few hollows where part of the wood came up with the siding, and I smoothed these out with wood filler. Otherwise, I’m really happy with it. As I said the night I ripped off the siding — there’s always a way to fix a die-cut house!
Since I could no longer rely on siding to cover up the surface imperfections, I needed to use wood filler on many cracks and slot holes. I did this all afternoon… filling holes, waiting for the wood filler to dry, sanding them down, and filling again. I didn’t take any pictures because it wasn’t very exciting, but I repeated the process three or four times. While I was waiting for the wood filler to dry, I got to work painting the shutters and porch railings.
I applied wood filler to the edges of the shutters before painting, to make a smoother edge. I did the same on the inside of the windows. I wanted to do this on the railing too but there are so many nooks and crannies and small spaces that are hard to get my fingers into, I opted against it. The top edge of the railing is covered up with trim, anyway, so that will not be visible. I will add wood filler to the bottom edge but haven’t yet.

Next, paint! Painting trim is pretty tedious and seems to take forever, so I’m glad I was alternating between that and the filling / sanding on the house. I am using some of the same paint I have for my Fairfield, but reversing it. The house will be purple, with tan trim and maybe light green accents.
Painting porch railings:

After seeing a finished Arthur on eBay that didn’t have a porch roof, I decided to do this on mine as well. I don’t like how the porch roof blocks a lot of the front of the house. I love the shade of purple I’m using and want it to be visible! This means the porch posts are taller than I need them to be. Rather than try to cut them down to a smaller size, I decided it would be much easier (and prettier) to use some Houseworks newel posts. I ran up to Dollhouses, Trains, and More, a shop about 10 minutes away from Geoff’s hangar (very convenient for me!) and bought some Narrow Centurian Newel Posts made by Houseworks. I like these because the slight point on the top complements the little points on the inside of the railing. The newel posts are too long so Geoff helped me cut them down with his band saw. (No pictures yet, sorry!)
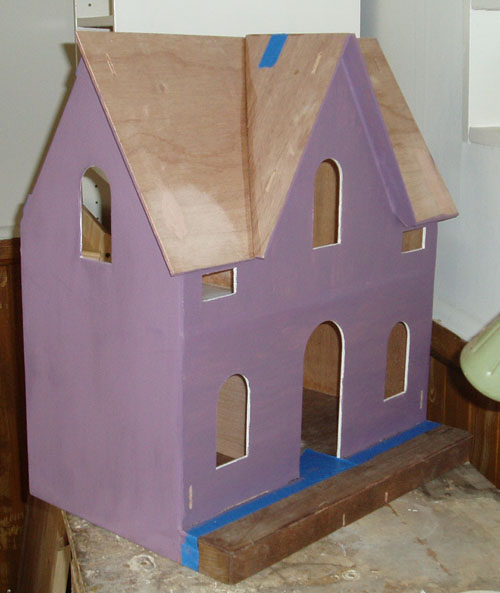
When we got home from the hangar I put the first coat of paint on the house. I’ll say it again… I LOVE this shade of purple!

The house looks pretty content in its new color. I think it has forgiven me for the siding debacle.


 Emily is a freelance writer, miniaturist, and adventure game enthusiast.

