The Den of Slack

emilymorganti.com

Page 44 of 232

Bathroom tile rehab

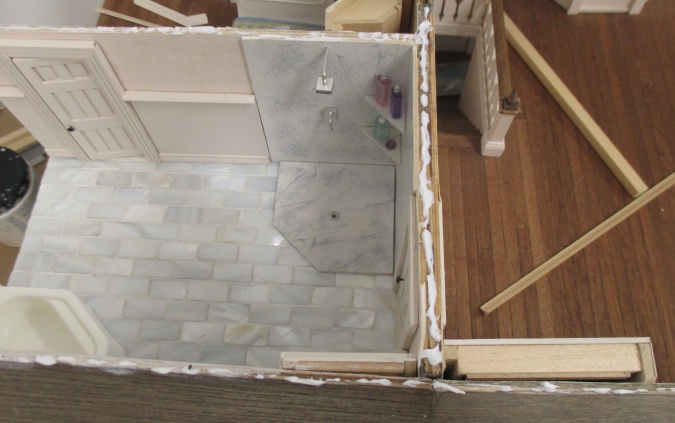
Once upon a time the Victorianna had a pretty peach bathroom. This was the first room I finished (four years ago!) and I was really happy with it. The tiles were from Elf Miniatures and I loved the color.

Fast forward a year. About six months after moving into our new house in San Francisco, I noticed the floor tiles had become discolored. The Victorianna had been sitting in the garage with sunlight shining on it through a window, and it hadn’t occurred to me until it was too late that this might cause damage. I suspect the tiles were ink jet printed.

Only the floor was faded — the shower surround still looked okay. I replaced the flooring with a plastic sheet of hex tiles and hoped the shower tiles wouldn’t fade since they were tucked back in a corner.

No such luck. It started with the upper right corner and gradually spread. With the house is almost finished, I didn’t feel good about leaving the bathroom in this state. And after fixing a similar, much more complicated issue in the Queen Anne Rowhouse, I figured if I could fix that, I can fix anything!

I started by removing the shower door. After a minute or two of unsuccessfully trying to pry it off, I got annoyed and punched it with my finger. The channel molding holding it in place broke, and the door fell into the shower. Almost too easy!

Next I peeled the tile off of the right wall. I was pleased to see I’d had the foresight to wallpaper almost all the way to the wall. This way I didn’t need to worry about a transition between the wallpaper and the new tile.

This is the scrapbook paper I picked out for the new tiles.

Like with the backsplash, I used 1/16″ thick basswood as the backing, and painted it with my Tuscan Beige trim color to make the grout. Then I glued on the tiny 1/8″ x 1/8″ squares one by one. It took a long time!

Continue reading

Stainless steel stove and an unnecessary floor fix

I’ve received a lot of comments from readers of my blog thanking me for documenting my mistakes. I never really set out to do that — I guess I just make a lot of mistakes! This is going to be one of those posts.

As of my last post, the Victorianna’s scratch-built kitchen was almost finished. I’ve found that big mistakes often happen when a project is almost finished — I try to tweak one last little thing and the house of cards comes crashing down. In this case it was the floor. In the nearly four years (!) since I laid the hardwood, it had gotten kind of dingy. Dust got into the grain of the wood and so it looked like the wood had white scratches and speckles all over it.

I thought I could fix this by staining over it. In fact, I was so confident in the idea that I jumped right in without doing a test piece first. In my mind the stain was going to match the floor color completely. In fact, it didn’t. (Who could have predicted that?!)

Since the whole house (except for the bathrooms) has the same floors, now my kitchen didn’t match the rest of the house. No way I was going to stain ALL the floors, which would require removing baseboards and very likely messing up the wallpaper… that house of cards is about to topple!

So I did something perfectly reasonable: I ripped it out.

Most of the boards ripped off the paper backing, leaving the sticky part behind. (If you weren’t following along back then, here’s how I made the floors from micro veneer.)

This isn’t my first re-do of the kitchen floor. Originally I’d intended for it to be tiled, but the tile came out crooked. I ripped that out and redid it with hardwood on a whim, but now that I’d ruined it, I started thinking about tile again. Since making a backsplash out of scrapbook paper had turned out well, I decided to try something similar on the floor, but with a bigger tile.

I bought a 3/4″ square paper punch and two scrapbook paper options – one black “chalkboard”, and one marbled white.


Continue reading

Victorianna kitchen *almost* done

So I said in my last post that this would be the grande finale for the Victorianna’s kitchen. It’s not — I still have to finish the stove, and I might have torn up the hardwood floor for no good reason. (Oops.) I’ll leave you in suspense about that until it’s fixed, but for now, here’s the *almost* grand finale!

When I made the backsplash, I made the part under the hood to fit snugly between the upper cabinets.

Once the cabinets were painted it needed to be sanded down at the sides in order to fit. I did this until it fit well again — but then found that the uppers on the right (which are connected to the fridge cabinet) weren’t pushed all the way back into the corner, so I’d actually sanded too much. During sanding I also messed up the spacing of the tiles so they were no longer even with the row below them.

So I redid that piece. Luckily I had enough tiles left. I started with the center and side columns to make sure they lined up.

Once again, I left the bottom tiles hanging slightly over the edge to cover the seam.

When that piece was finished, I glued on the large panel. I had already glued on the one under the sink, so this panel needed to slide into place. I didn’t want to smear glue on the wallpaper so I put the glue directly on the wall, and then slid in the panel over it.

Some glue did spooge out the bottom, and I just wiped it off with a tissue. That will be covered by the cabinets so it doesn’t matter if I got a little glue on the wallpaper down there.

Next I glued in the small panel. Even with the tiles overlapping, you can see the seam here.

I filled in those holes with white grout on the tip of a toothpick.

At this point I was ready to add crown molding. I didn’t want it to compete with the (different) crown at the top of the cabinets, so I’d planned to use a smaller cove molding here, but this ceiling is a little warped and it didn’t look good. Regular crown molding hides the gaps better.

Continue reading

« Older posts Newer posts »

© 2024 The Den of Slack

Theme by Anders NorenUp ↑