The Den of Slack

emilymorganti.com

Page 45 of 232

Victorianna kitchen window

When I first started working on the Victorianna — four years ago! — I bought a pack of Grandt Line windows planning to use one in the kitchen.

It wasn’t as deep as the plywood wall + siding. I always figured I could do something with strip wood to make up the extra space.

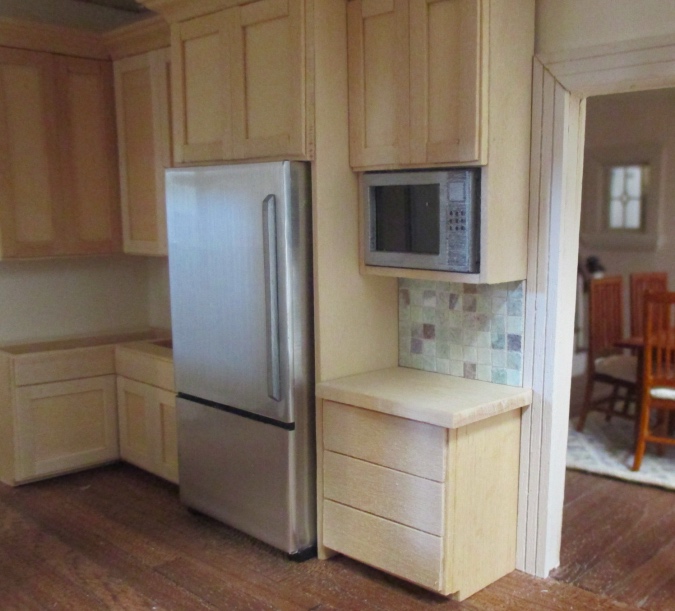
Well, when it came time to finish the window I spent an afternoon messing around with strip wood, and I couldn’t come up with anything that would play nicely with the window *and* the backsplash. It didn’t help that the window is deep inside the room and I can’t see it straight on. I was starting to get frustrated (and a sore neck!) trying to figure out something that would work.

Houseworks windows are slightly deeper than the plywood wall + siding, but don’t come in this size. (The closest is this square window but it was slightly too small.) I previously cut a Houseworks window in half to make a piano window for the dining room, and decided to do the same thing in the kitchen.

I don’t remember exactly how I did this before (hey, it was four years ago!), but I know I used the miter box to cut the window down. I tried that this time and totally mangled a window. Then I remembered a trick I’ve heard about putting the window in the microwave to soften the glue. I put a window on a plate and nuked it for 10 seconds. When I took it out, it fell apart in my hands. For once that was a good thing!

With the pieces separated, it was easy to cut down the sides to the correct height and then put the window back together.

I applied glue and set the window in the hole to hold it square while it dried.

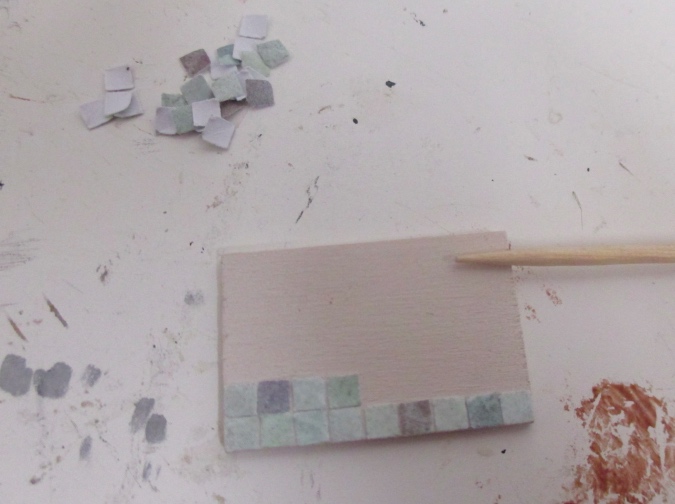
This protrudes about 1/16″ into the room, the same depth of the backsplash board.

Continue reading

A shiny black countertop

In my real life kitchen, I picked out the countertop first and then spent a crazy amount of time finding backsplash tiles that would go well with it. I ended up with tiles in the same color family as the countertop, but a few shades lighter.

I wanted to do something similar in the Victorianna so I started by painting a green stone-like countertop, using the dry brush technique I’ve used in other kitchens.

Short version: it looked bad! The backsplash is busy and I didn’t have the right shades of green to paint something that looked good against it. I didn’t even take a picture. I covered up the green with a watery coat of Bleached Linen (the same paint I’m using for the cabinets) and put it aside for another day.

I looked online at pictures of white kitchens with green backsplashes and saw a lot of black countertops. It wouldn’t have occurred to me to try black, but why not? The nice thing about paint is you can cover it up. (And I usually have to a few times before I get a countertop right!)

For years I had a little bottle of black craft paint that came out nice and dark on the first coat. When that ran out last year I bought a bottle of Craft Smart paint that’s much more watery. It always takes several coats for full coverage. The middle piece in the picture below is after one coat of black — I didn’t like the brush strokes. So I tried sponging it on with a sponge brush instead. That plus the white base coat came out looking stone-like, as you can see in the piece on the right.

After sponging on one coat of black, I let the pieces dry and then sponged on another coat of black. Here’s the result.

Continue reading

Tile backsplash made from scrapbook paper

After completing the kitchen cabinets, I turned my attention to the backsplash. It’s not easy to find realistic tile to scale in 1:24. I was really tempted to print something out, but after the problems I’ve had with printies fading, I didn’t want to tempt fate. So I started thinking about how I could use scrapbook paper to simulate tiles.

I wanted subway tile, but a post from 1 Inch Minis got me thinking about doing a mosaic tile instead. I bought a Fiskars border punch off eBay that punches out 1/8″ x 1/8″ squares.

I got a piece of Teal Agate scrapbook paper from Michaels. The colors seem very blue/green on the website, but in reality it’s more like an alternation between green and purple. I concentrated the punch on the green areas.

This is what gets punched out.

I pushed down on the squares to flatten them, and then scooped them into a container, discarding any that were too dark, gold, or white.

This is how many tiles I got from one sheet of paper (including some off colors mixed in that still need to be discarded).

I cut a piece of 1/16″ thick wood the size of a backsplash panel, and painted it with my Tuscan Beige trim color. This is the panel that goes under the microwave. I squirted tacky glue onto a piece of wax paper, and then used the tip of a toothpick to add a dab of glue to the backing. Then I flipped the toothpick over and used the clean end to nudge a tile into place. I just eyeballed the grout lines.

Here’s my first attempt. After seeing it in place, I picked off a few tiles that seemed weird and replaced them.

I think if I had painted these with matte varnish they would have looked like stone, but I wanted a shiny finish. I used a toothpick to put a dab of clear Gallery Glass on each tile, keeping it off the grout lines to maintain separation between the tiles.

The Gallery Glass dries clear and shiny.

Continue reading

« Older posts Newer posts »

© 2024 The Den of Slack

Theme by Anders NorenUp ↑