The Den of Slack

emilymorganti.com

Page 53 of 232

Queen Anne Rowhouse revisited (a.k.a. fixing a huge mess)

I have a tendency to get very close to finishing a dollhouse and then let it sit, 90% done, for years. That’s what happened with the Queen Anne Rowhouse, which I mostly finished between 2012 and 2014.

To refresh your memory, here’s how the house looks. Except for shingles, the exterior is finished.

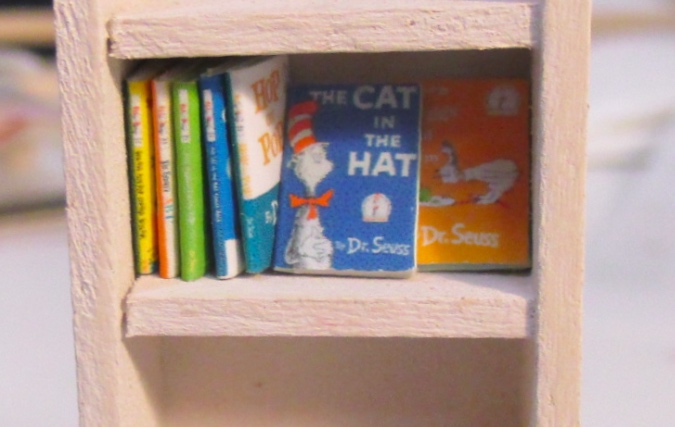
I started shingling the house way back in March 2013. (Yikes!) This side was partially shingled for a long time. In the past month I’ve made good progress shingling while binge watching ER reruns, and now this side is almost finished.

The other side still has a ways to go.

Besides shingles being booorrrring, the other reason I stalled on finishing the rowhouse is because of a disaster in the “stair rooms.” These are two rooms behind a hinged panel, with two complex staircases that my dad helped me build.

I was really proud of the staircases, but they made accessing the rooms nearly impossible, especially on the second floor. So when the wallpaper (which I had made and printed out myself) started to become discolored, I just couldn’t imagine a way to fix it.

Here’s how it looked when I finished the hinged panel in early 2014. The paper on the panel was brand new at this time, while the paper in the room had been installed about a year earlier.

You can see that the paper inside the house had already started to darken. I believed this was the glue interacting with the paper or ink or wood in some way, and took precautions to prevent it from happening with the hinged panel. (Attached the paper to scrapbook paper instead of bare wood; sprayed the back of the paper with matte sealer before gluing.)

I didn’t go so far as to use different glue, because I had used this glue (wallpaper mucilage) with lots of other wallpaper and scrapbook paper before and stubbornly refused to believe that could be the sole culprit. At this point I figured that as long as the hinged panel, which is most visible, stayed pretty, the rest of the room was bearable.

Fast forward to October 2015, just before I moved into my new house (where I have had some additional issues with home-printed paper discoloring, described here). You can see some dark streaks have started to form.

And here’s how it looked in December 2016, after about a year in the garage workshop of the new house. In addition to the dark streaks, areas are fading and turning green.

This is similar to the discoloration that happened in the Rosedale bathrooms, which makes me think there’s something about the workshop environment contributing to it — the wet, salty air? (We live near the ocean.) Since this is a hinged panel that’s usually closed up, it can’t be solely due to light.

Continue reading

Miniature children’s book tutorial and printie

I accidentally turned off the automatic blog updates, so emails didn’t go out for the last couple of posts. If you missed the Victorianna nursery trim or the grand opening of the Blackbird Bar, please check them out! And here’s a quick tutorial for the children’s books I made and then ended up not using in the Victorianna’s nursery.

I like my miniature books to look like real books, with a front cover, a back cover, and a spine. Front covers are easy to find online, and Amazon sometimes displays back covers, but finding the spine can be tricky. Of course when you have books on a shelf, the spine is also the most visible part, so you really need it for the mini book to look realistic.

I made several children’s book covers by piecing together the front and back covers pictured on Amazon, with spines off of photographs from an eBay auction. Here’s a file you can download with some of the covers I made (for personal use only).

Continue reading

Nursery trim and built-in shelves

A while ago I used some resin embellishments I had lying around to make knee walls for the Victorianna’s nursery. The one to the left of the tower door would have looked like this.

Since then, I finished the master bathroom, which is next to this room. In the bathroom I put a piece of siding under the sloped part of the roof. To be consistent I decided to do the same in the nursery (and I’ll also do it in the master bedroom, on the other side of the house).

I built a shelf to attach the siding to.

My initial plan was to fill the shelf with books. Here are some I made with covers I found online and resized.

But I would have had to make a lot of books to fill up those shelves, plus the covers aren’t visible once they’re on the shelf, especially from the angle where this shelf will be installed.

The nursery already has a toy shelf in the corner and I didn’t think it needed another one, so I ended up making baskets. I made these the same way I did the linen closet basket, except I didn’t bother with piping. The material is “fiddler’s cloth” that I had in my cross stitch stash (a thrift store purchase). I don’t know why it’s called fiddler’s cloth, it just looks like Aida to me.

Before I could glue in the shelves and siding, I needed to figure out what to do about trim around the tower door. This has stumped me for a while. The gaps between the roof cutout and tower walls would have required large pieces of trim to cover up, and I just couldn’t think of a classy way to do it.

I stared at this for a very long time and kept thinking, “If only I could redo the ceiling!” Well, why not?

I made a ceiling template using strips of paper. Here are the first two pieces. To figure out the angle, I just put the piece of paper in place and folded it where it met the wall, then cut along the fold line.

I worked my way across the ceiling, taping the strips together as I went.

Here’s the finished template. It doesn’t look tight against the tower in this picture (and the next one) because it’s held on loosely with tape, but in reality it’s a snug fit.

Next I traced the template onto a piece of stiff paper.

I glued that to a piece of ceiling paper larger than the template.

Then I cut around the edges with an Xacto knife.

I neglected to take a picture of the new ceiling before I started adding trim, which is a shame, because it looked beautiful. The seams against the tower are nice and tight and you can’t tell at all that it’s glued on top of the original ceiling.

Continue reading

« Older posts Newer posts »

© 2024 The Den of Slack

Theme by Anders NorenUp ↑