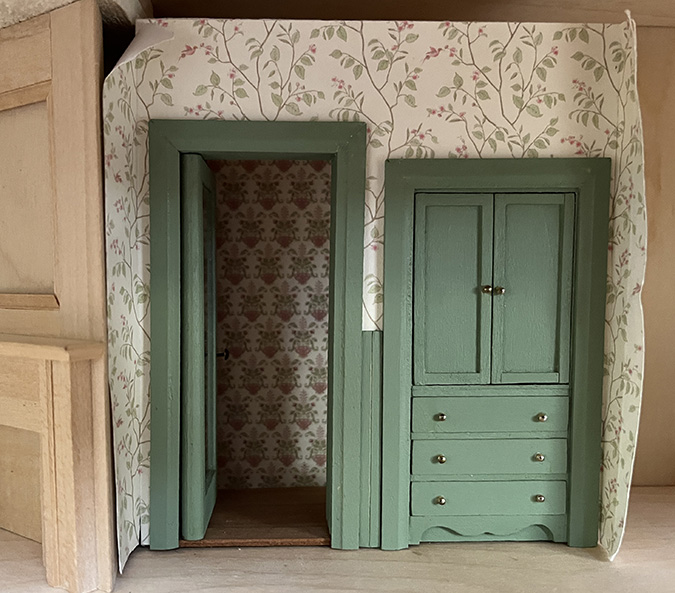
Fourteen months after I started the Mansard Victorian’s bathroom by kitbashing Cassidy Creations kits into a linen closet, I’ve finally hit the home stretch with this little room.
Something that was holding me up was my indecision over whether I should finish the area behind the bathroom door. The door is set in a false wall, with wiring accessible behind it.

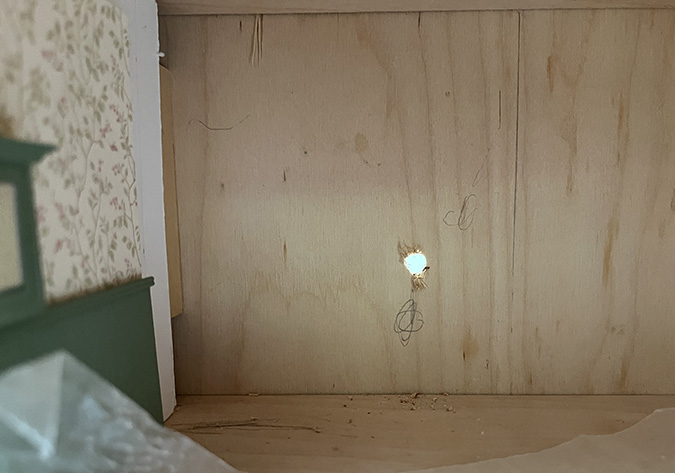
The bathroom wall has more space behind it than the bedrooms will (because I didn’t need such a long skinny room, and to accommodate the built-in linen closet), so I thought I should make it look like a hallway back there.
I started this process months ago by cutting hardwood floor pieces to go in that space. As I was doing this, I realized I couldn’t live with the threshold, which I’d stained hoping it would blend in with the flooring. I just didn’t like how it looked and wanted a seamless transition like the kitchen door has.
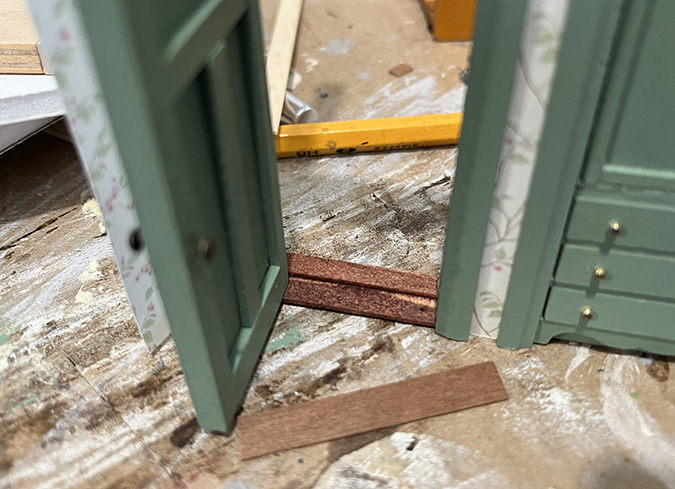
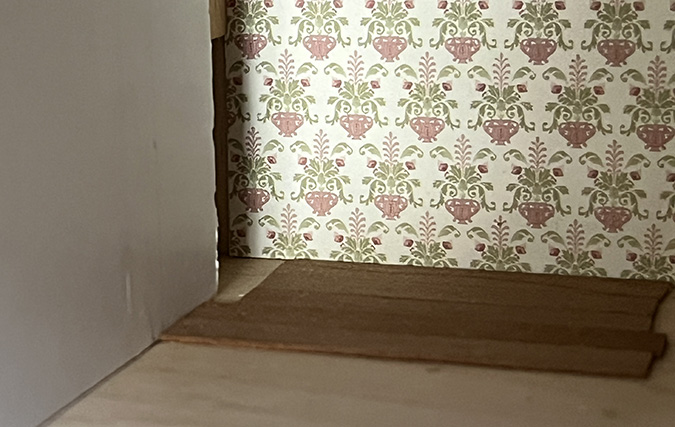
The door was already glued into the false wall at this point, so I couldn’t do much to modify it, but I was able to remove the threshold and replace it with a piece of flooring. Since the flooring piece was skinnier than the threshold, this resulted in a big gap (and visible pin hinge) at the top of the door.
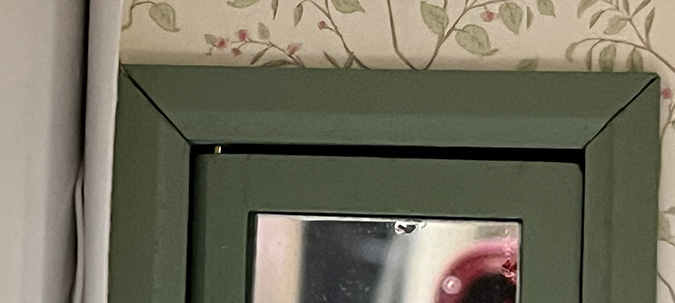
(Since taking that picture, I’ve filled in and painted over those big cracks at the corners!)
I stacked two floor pieces together to make the threshold taller.
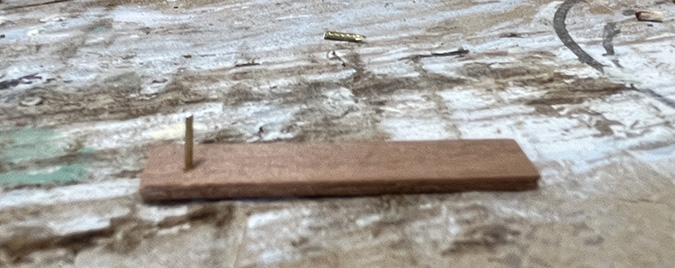
The new threshold is glued to the trim on each side, just barely, but once it’s glued into the house it won’t go anywhere. I put a tiny piece of Scotch tape over the pinhead to keep it from falling out in the meantime.
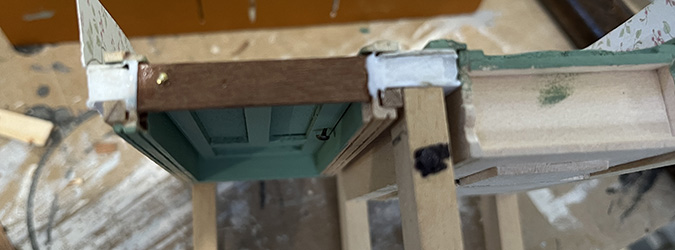
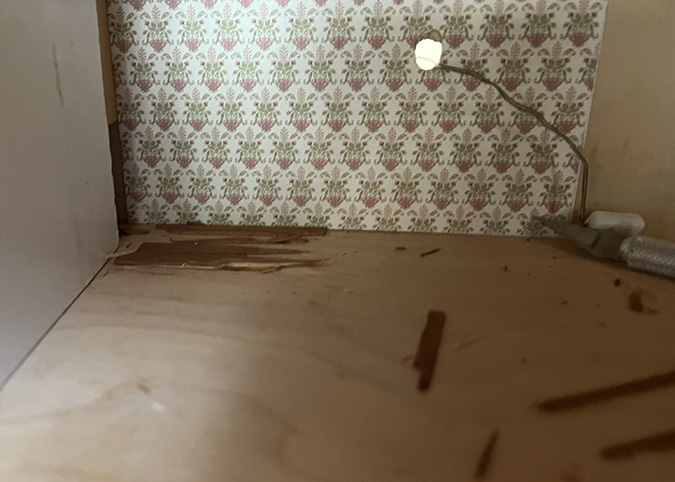
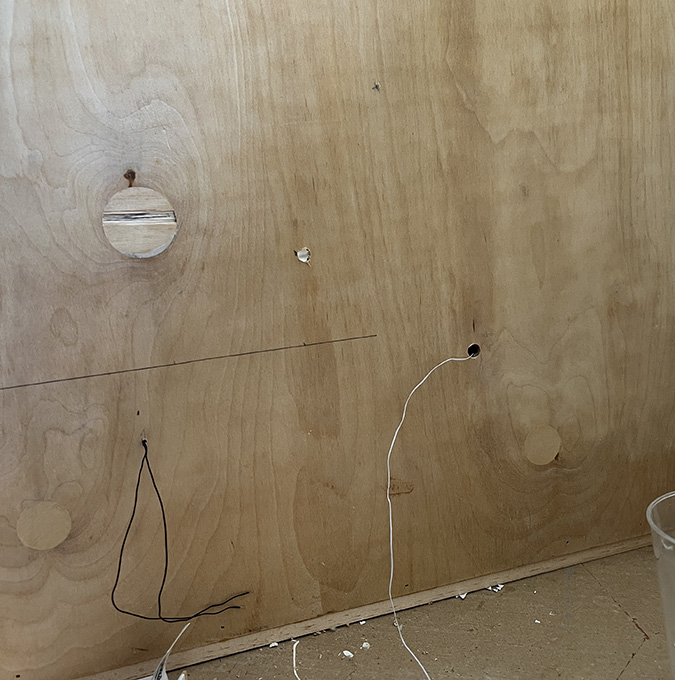
I cut a piece of the wallpaper I used downstairs and glued it to the back wall. There will be an outlet in this space that the two bathroom lights plug into, attached to a power strip on the outside back of the house. The hole is for the outlet’s wire to go through (it’s so big because I didn’t want to remove the plug from the wire).

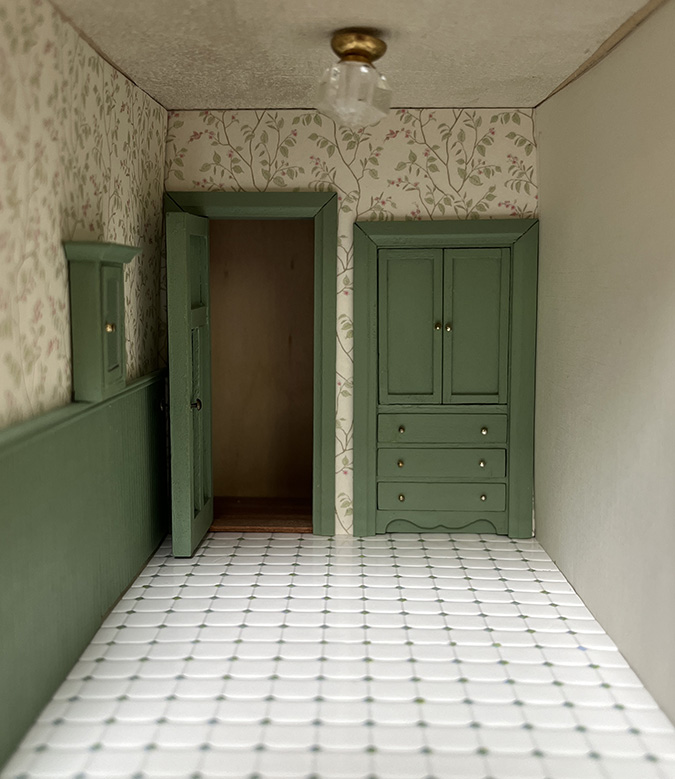
When I glued in the flooring pieces a couple weeks ago, it had been so long since I cut them I couldn’t remember why two of them were longer. I assumed since you can’t really see back there that I had just been haphazard about it. (You know what they say about assuming…)
It looked fine head-on. But when I put the side walls in and looked through at an angle, I was able to tell that the floorboards stopped before they were supposed to. Oops – I guess that’s where those two longer boards were supposed to go!
The right thing to do in this situation would have been to take a deep breath, maybe sleep on it, and come to the conclusion that it really didn’t matter, it was barely visible, nobody cares, etc.
The wrong thing to do in this situation was this:
Silly me, I thought the floorboards would pry up easily. They did not. This was the best I was able to do. Argh.
Cardboard to the rescue!


 Emily is a freelance writer, miniaturist, and adventure game enthusiast.

