Update: This project was so much fun I decided to do more! I’m stitching Thimbleweed Park’s cast on an afghan and hope to post a chart for each character. Get them here!
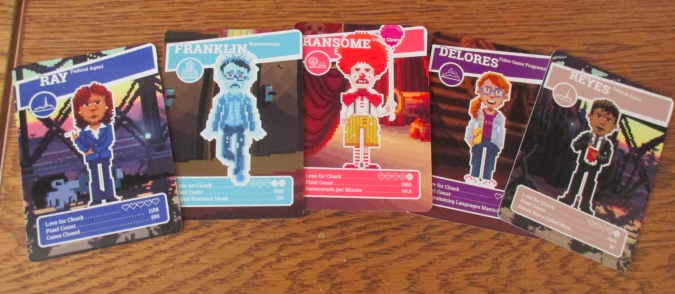
I rarely post about my day job on the blog, but I do contract PR for video games, and I have been working on Thimbleweed Park on and off since it was Kickstarted in 2014. Recently one of the game’s creators, Ron Gilbert, retweeted a cross stitch someone had done of a character from one of his previous games and I thought hey, I can do that! I decided to stitch up Thimbleweed Park’s five main characters and send it to him to commemorate the game’s March 30 release.

Thimbleweed Park is an adventure game with five main characters you switch between while you’re playing. I had access to layered PSDs of the trading card art for the five main characters.
I hid the backgrounds and arranged them in a line-up. In theory, cross stitching pixel art is easy because each pixel equals one stitch, but the Thimbleweed Park characters’ pixels don’t have a one-to-one correlation with the pixels on the screen. (It’s meant to look low-res, but it isn’t really low-res!) I reduced the image using the “nearest neighbor” filter in Photoshop to retain the hard edges, and then did some manual touch-ups on spots that looked weird after the reduction.
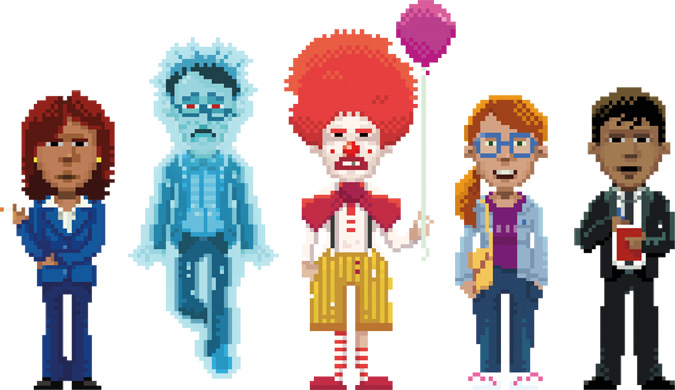
I used a program called KG Chart to convert this into a cross stitch chart. This is the image I imported. It’s 196 pixels wide by 113 pixels high, which looks pretty tiny on a high-res computer monitor. The design is stitched on 32-count linen — that’s 32 threads (and pixels) per inch — so the finished cross stitch is about 6-1/8″ x 3-1/2″.


 Emily is a freelance writer, miniaturist, and adventure game enthusiast.

