The Den of Slack

emilymorganti.com

Page 83 of 232

Cleaning up the Little Belle

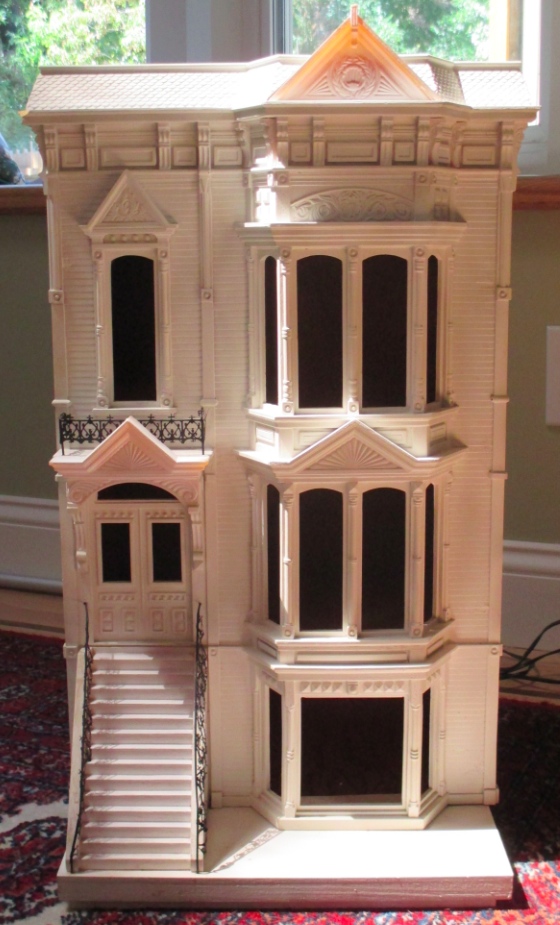
First things first: someone who read about my Little Belle tipped me off to the one pictured at the right, which was sold in a silent auction in the Texas Showcase of Miniatures in 2012. (See here for details — I got the poster’s permission to repost the photo, though it’s been so long she might not remember! I found this in November 2014, just never blogged about it.) I emailed the Texas Showcase to ask where they got the house but they didn’t get back to me.

This brings the tally up to 10 known Little Belles, out of a production run of about 20. I still hope to uncover more of them! If you own or know of a Little Belle dollhouse that isn’t mentioned here or here, please contact me.

Anyway, since I bought the Little Belle almost two years ago, she’s been patiently waiting her turn. I actually did a little work on her last summer but didn’t get too far before I had to pack everything up for the move. Here, finally, are those photos.

This is how the house looked when I got it. There were three things I wanted to address before painting: repair a crunched corner on the left side of the roof, re-glue the peeling siding, and replace the ugly hinges.

Continue reading

Miniature mobile for a little girl’s room (half scale tutorial)

I just finished the bay window trim in the Victorianna’s little girl’s room, realizing too late that the header is crooked (it’s higher on the left than on the right).

I thought hanging something from the ceiling near the right side of the header might distract from the crookedness. I looked online for miniature mobiles or dream catchers that would work in half scale, but wasn’t really finding what I wanted. So I made my own! (And now you can, too!)

Here are the basic supplies, from Michaels: head pins, Bead Landing Pemberley flower charms, and Bead Landing Specialty Findings (bead caps). I can’t find the flower charms on their website, but you could use other beads in place of these.

Other materials that I already had in my stash are a Peruvian ceramic bead shaped like a fairy (Shipwreck Beads is a good source for these), silver seed beads, and one decorative headpin, because the hole at the bottom of the fairy was too big for the regular headpin. An alternative would be to use a regular head pin with a bead at the bottom, to keep the fairy from slipping.

Continue reading

Victorianna – bay window trim

Usually with a die-cut house, if I’m using the windows that came with the kit I’ll apply wood filler to the inside edges of the window to smooth them out. I do this once the trim (either interior or exterior) is glued in and then carefully repaint, to give the edges plus trim a nice uniform surface. For the Victorianna’s bay windows it will be much easier to glue acetate to the outside of the window, so my plan was to add the interior trim and then use the wood filler to smooth out all the interior edges.

But because cutting out the window holes left some jagged edges on the wallpaper, I decided to cover the window edges with strip wood the same way I do with doors. This seemed like a better plan for a smooth finish, with less chance of getting wood filler and paint on the wallpaper.

I started by painting one long piece of 1/16″ thick stripwood my Tuscan Beige trim color. This cuts easily with scissors so I cut the pieces to fit each window, once the paint was dry. Here you can see the window on the right with trim installed, and the one on the left without.

With all three windows were trimmed out, I next added vertical trim at the sides of the arch. These are made from one piece of half scale door/window casing flush with the wall, butting up against piece of strip wood that covers the plywood edge. Once the glue dried I carefully painted over where the trim pieces meet, to get rid of visible seam.

(I had to use a larger piece to cover the plywood edge on the right side than on the left, to account for a gap where the walls don’t quite meet there. Because of the angle you can’t see this bay window head-on, so it doesn’t matter the trim’s inside edge is slightly larger on the right than on the left.)

With the vertical trim glued in, I measured and cut a header piece. I couldn’t come up with a graceful way to handle trim around the arch (and didn’t want to use what came with the kit) so instead I’m covering the arch to square off the opening.

I added crown molding around the top of the header. This is a different style than the crown molding I used in the room — I didn’t want the header to look like repurposed crown molding, but like a distinct element.

Continue reading

« Older posts Newer posts »

© 2024 The Den of Slack

Theme by Anders NorenUp ↑