Continuing with the floral trim, I wanted to add it to the bump-out on the side of the house. I did this on my original Queen Anne Rowhouse, but painted the roof instead of shingling it.

This time I decided to shingle the roof. Not my best work.

The problem here was that I measured the first two rows, but I eyeballed the top row. These are partial shingles and I should have cut off a bit more so the spacing between rows would look more uniform.
I thought I could fix it by adding one more row of shingles at the top, but that might have made it worse?

Here’s how it looks with the trim.

In hindsight I wish I’d mitered these corners. When I originally cut the pieces, I had *just* enough and couldn’t be picky about where in the design the side pieces came from. I figured there was no point in mitering the corners if the designs wouldn’t match up anyway. But since I ended up buying more trim, I should have cut new side pieces, matched up the designs, and mitered those corners. Alas.

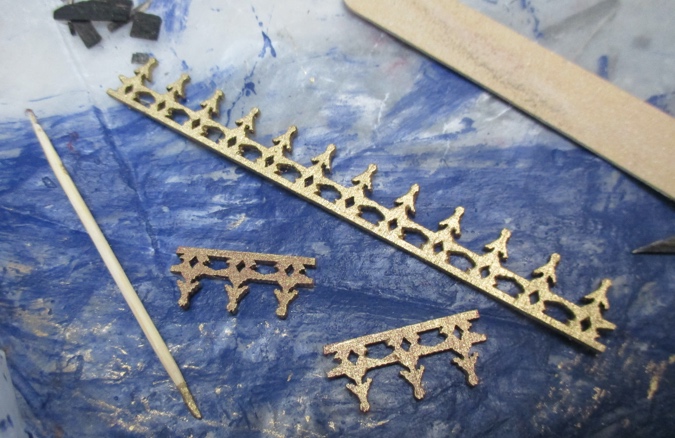
This is a piece of roof trim I had left over. I originally bought this for the Victorianna but ended up not using it, and then I cut the tips off of some of it to use on the front facade. The remaining piece is just long enough to fit here.

Luckily, I never throw anything away! Before I decided not to use this on the Victorianna, I had cut a few small pieces that I saved. This gave me enough for the two side edges. I painted the trim gold.

But I don’t think gold is right. Maybe it should be blue? Since this is similar to a railing, I’m going to hold off on finishing this until I do the railings. I think the railings will be blue, but not 100% sure yet.

Moving on to the tower. This is the reason I bought more of the resin trim. I didn’t like how the gold dentil trim had turned out and decided to cover it up.

The space to be filled is a little more than 3/16″ tall and the resin trim is 5/16″. There wasn’t enough space above and below the design to sand it to fit in the space, so the resin trim needs to be glued over the space instead. I added strip wood to provide a flat surface to glue to.

One small section can’t get trim glued over it, since that part fits snug against the house when the turret panel is closed. I filled in the gap with wood filler and painted that area blue. I didn’t bother painting the rest of the strip wood since it’ll be covered up.

The resin design alternates between bows and flowers. The bow part is just long enough to fit on each segment of the tower, but there wasn’t enough blank space between the bows and the flowers to bevel the edges.

I glued in little pieces of quarter round to fill the gaps at the corners.

Voila!

That’s a wrap on the resin trim and corbels. There isn’t much left to do on the exterior of the house. I wanted to move on to porch railings next, but I shouldn’t install those before the windows are glued in, or they’ll surely get in the way. So I guess I’ll do the foundation next, and then start on the interior.


 Emily is a freelance writer, miniaturist, and adventure game enthusiast.


This is really looking beautiful I love the richness of the colors, and all your detail work.
Thank you!
Sometimes I hate shingles for just that reason! I think you adjusted them well though. And the trim looks great!
Thanks. :)
Gorgeous Emily!
I like your final shingle picture. The house is definitely a painted lady and you should be proud. Have you considered( I hate to say this)putting a piece of trim on the porch peak at the appex?
Do you mean the red triangular area over the stairs? There will be trim there, I just forgot to place it there for these pictures. You can see it here: https://www.emilymorganti.com/dollhouse/turret-house/turret193.jpg
I’m not 100% sure I like it, which is why I haven’t glued it in yet. I’m waiting to see if some other inspiration strikes.