The Mansard Victorian’s upstairs ceilings look lower than they are, due to a 5/8″ strip underneath the roof trim that hangs down over the top of the rooms.

Originally I thought about putting flourette bulbs or LEDs behind that trim piece, since they’d be hidden, but instead decided to take advantage of that space to install false ceilings. The wires for the ceiling fixtures will run to the back and come down behind a false wall, to be plugged in behind the door (like I did with the staircase).

I plan to do this in all three rooms on the second floor. The bedrooms will only need about 1/4″ of space between the false wall and the real wall — enough for the plug to fit behind the doors.
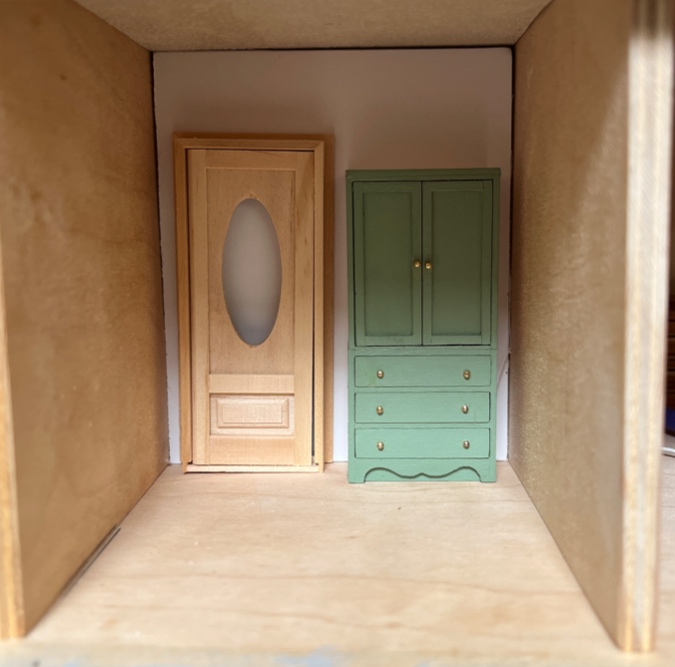
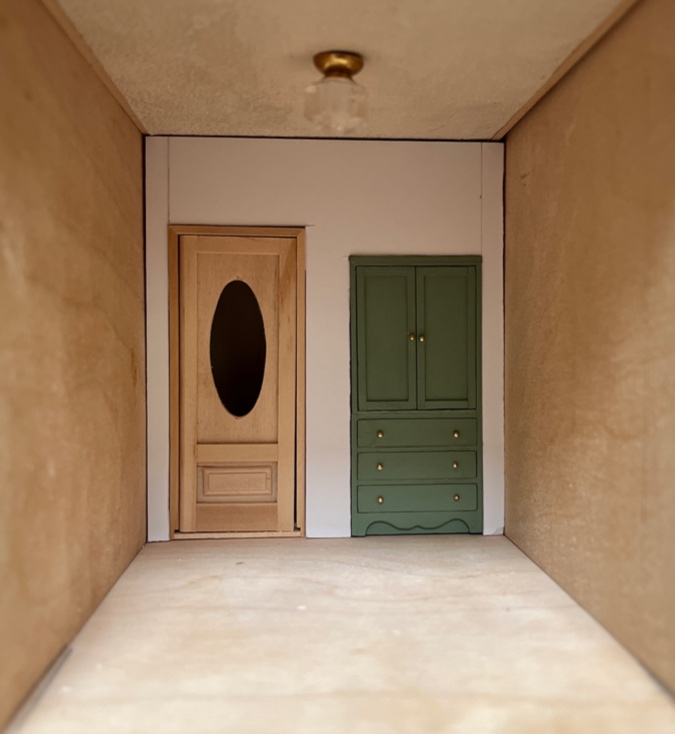
The bathroom doesn’t need to be so deep, so I’ll install the false wall farther into the room, lining up with the staircase wall downstairs. This will give the illusion that the (also false) staircase continues up to the second floor. In the picture below, the door and linen closet are sitting where the new wall will be.
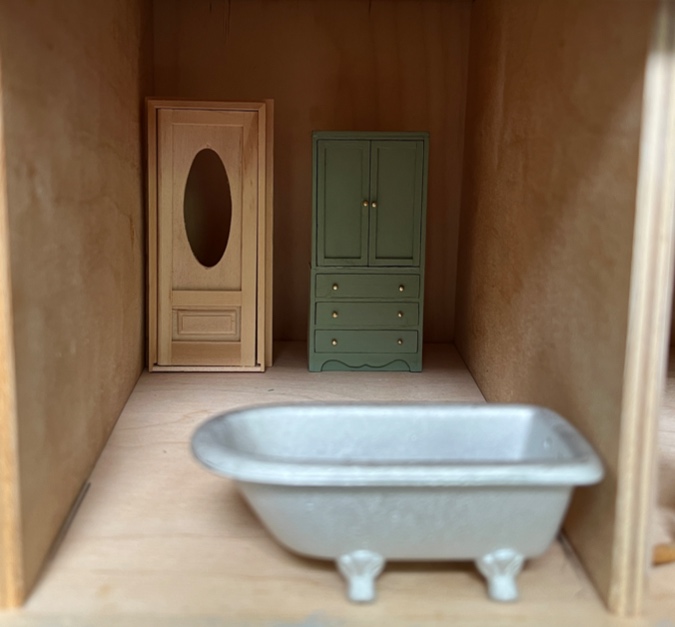
(The door won’t look like this when it’s done! I’m going to bash it like I did with the kitchen door.)
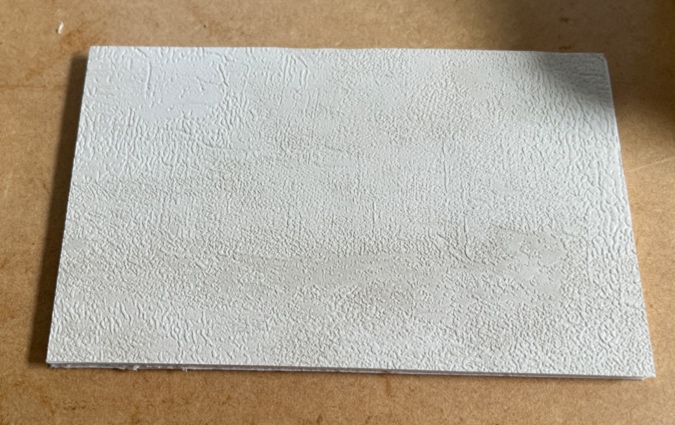
I bought a piece of 3/16″ foam board from Michaels — much easier to cut than wood, and when it’s finished you’ll never know the difference. I did something similar in the Sam & Max roombox.
I cut a piece for the bathroom ceiling, 3.75″ wide by 6″ deep, which is slightly deeper than the placement of the false wall.

I covered the foam board with the textured wallpaper I use for all my ceilings. I bought this roll of wallpaper at Lowe’s back in the early 2000s, have used it in almost every dollhouse I’ve ever worked on, and am still nowhere close to using it up.
In this case, since the ceiling will be tucked up behind the trim piece and the foam board is white to begin with, I could have left it alone, but I want all the ceilings in the house to match.
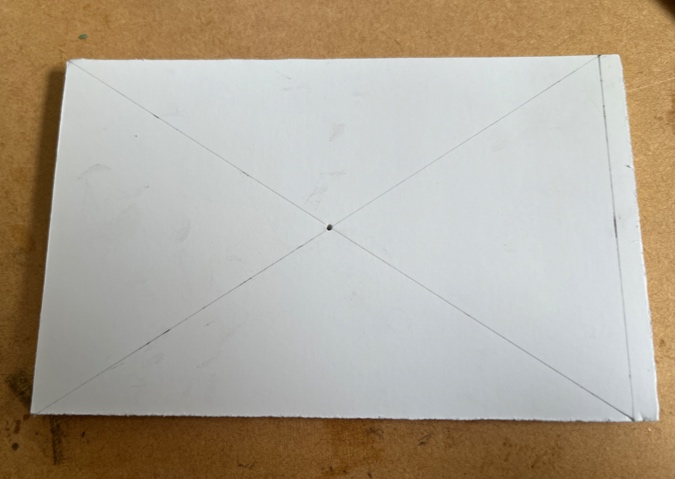
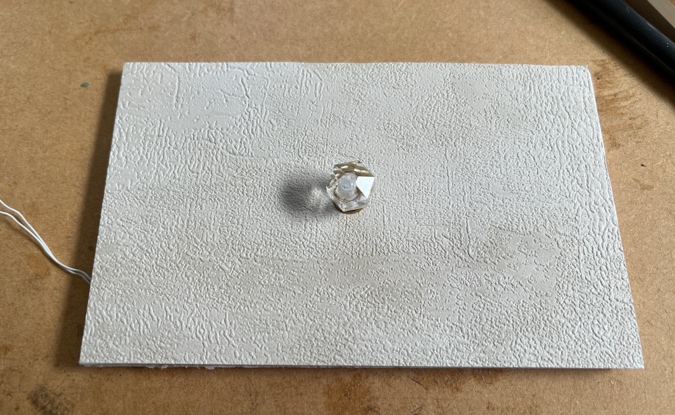
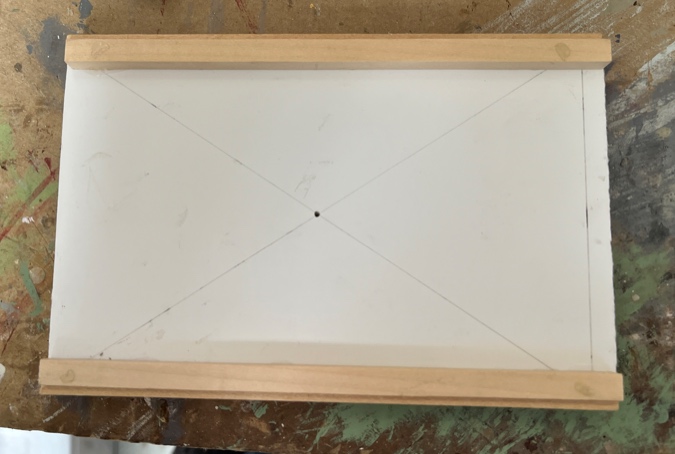
Next, I flipped it over and drew a line to indicate where the false wall will butt up against the ceiling. I then drew diagonal lines to find the center, and poked the electricity pilot tool through to make a hole for the light fixture wires to pass through.
I got this light in an eBay lot of Lighting Bug light fixtures. This one is a hexagonal shade ceiling light.
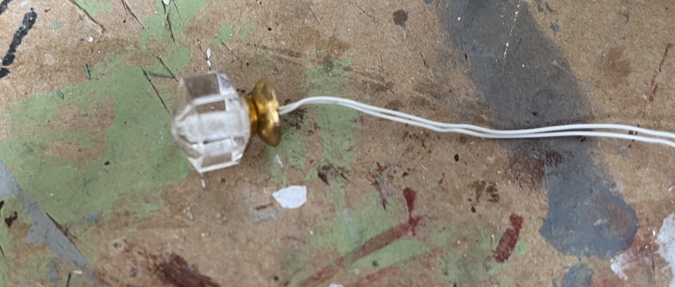
I love these fixtures and used them in my Fairfield — my first half scale house and only the second one I electrified, almost twenty years ago (yikes) — but I’ve never bought them again because most of them don’t have replaceable bulbs. One of the Fairfield’s lights stopped working early on and I never had the heart to tear apart the room above to fix it.
With the false ceilings, since the wire won’t be trapped under the flooring of the room above, and since I’m plugging the lights into outlets rather than hard wiring, my hope is that I’ll be able to remove a light and replace it if a bulb burns out, without having to destroy anything. That may or may not turn out to be true, but I decided to chance it.
I glued 1/4″ strip wood to the back of the false ceiling — forgot to take a picture, but you’ll see it farther down. Then I used glue dots to hold the ceiling in place temporarily. These are the dots I have, and they don’t actually stick for long. I wonder if another brand would work better, but like with the roll of ceiling paper, this one roll of glue dots is going to last me into old age.
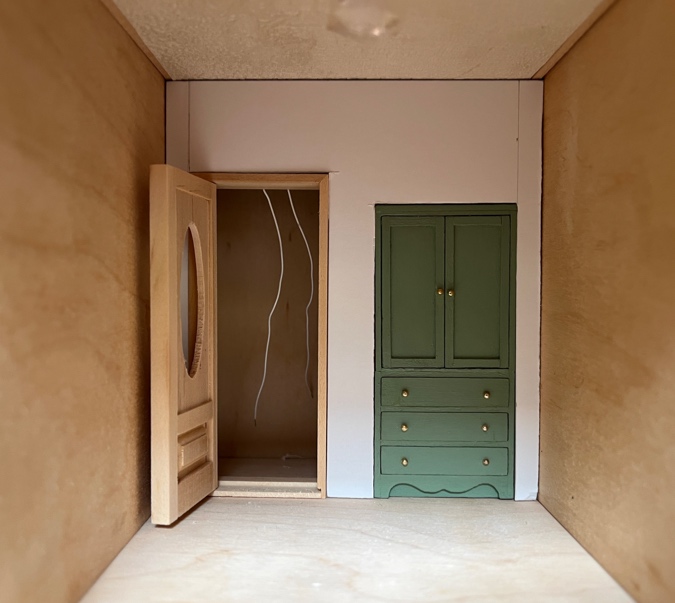
With the ceiling in place, I figured out how tall the wall needed to be and cut a piece of foam board. Hmm…. the door and linen closet look more cramped than they did when I started.
Referring to the pencil line I’d previously drawn on the floor, I moved the right wall into its proper position. Oops. Clearly “measure twice, cut once” is a lesson I haven’t learned.
So the bathroom was supposed to be 4″ wide, not 3.75″. I cut a new 4″ wall. That’s better.
I didn’t feel like redoing the ceiling, so instead I glued 1/8″ strip wood to each side. This makes up the difference, the light will still be centered, and the wood will be covered up by the crown molding.

Here’s what those 1/4″ pieces on the back of the ceiling look like (with glue dots still on them).
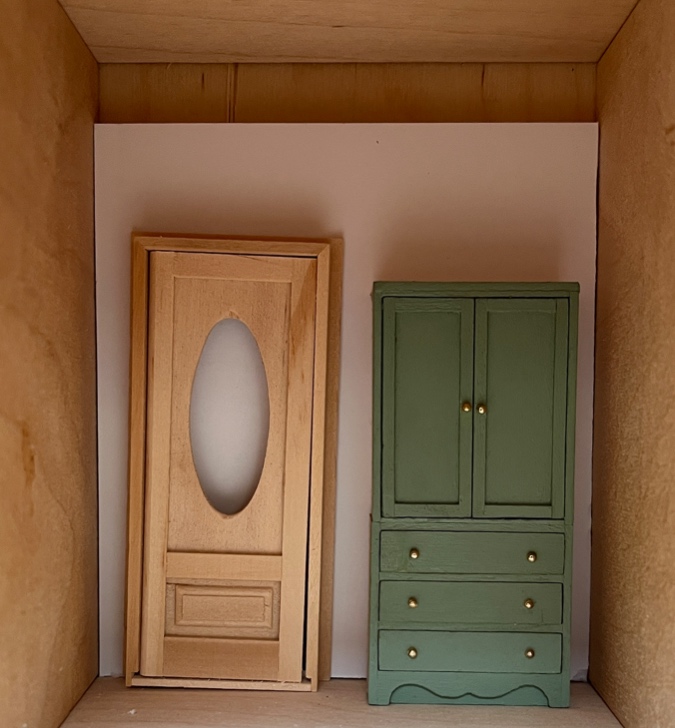
The linen closet and door are 3″ wide altogether. On the 4″ false wall, I drew lines 1/4″ away from each side, and then lined up the door on the left line and the closet on the right line and cut holes for them. This leaves 1/2″ between them.

Since the trim will take up some of that space, they’ll still be pretty close together, but I’d rather have a skinny bathroom in favor of bigger bedrooms.
The wires hang down into the area behind the door. A benefit of the false ceiling is that I’ll be able to add a plug before I glue in the ceiling — I won’t have to reach deep into the house to fiddle with it.
Next up: the bathroom floor! (Probably.)
 Emily is a freelance writer, miniaturist, and adventure game enthusiast.


Nice work! It’s going to look great. I really admire you for electrifying your houses. I’ve never attempted it.
I love this. It looks like a an authentic built in.
Wow! You do such amazing work!
Such nice progress & patience! Thank you for sharing again. I really enjoy reading your updates.