Haven’t been mini-ing much lately, but here’s some progress on Momma’s Kitchen.
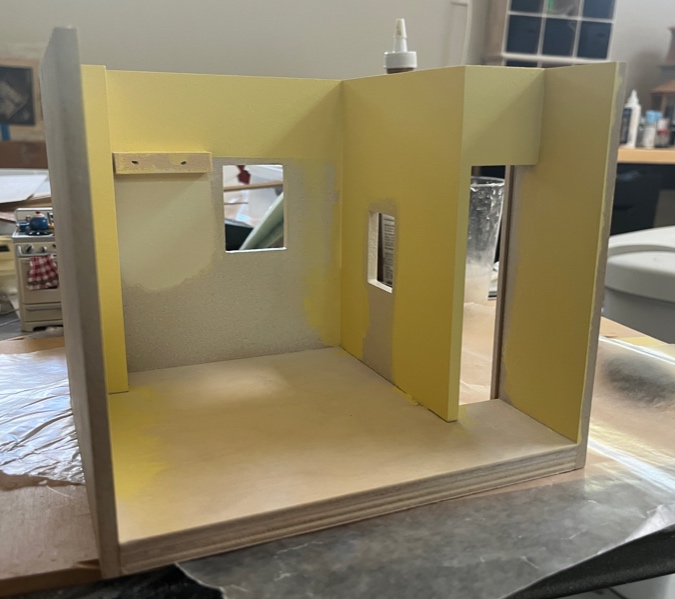
The walls got a few coats of the yellow paint that came with the kit. I found an off-white on my paint shelf that’s close to the cabinet color, and used it in the area that shows through behind the glass cabinet doors.
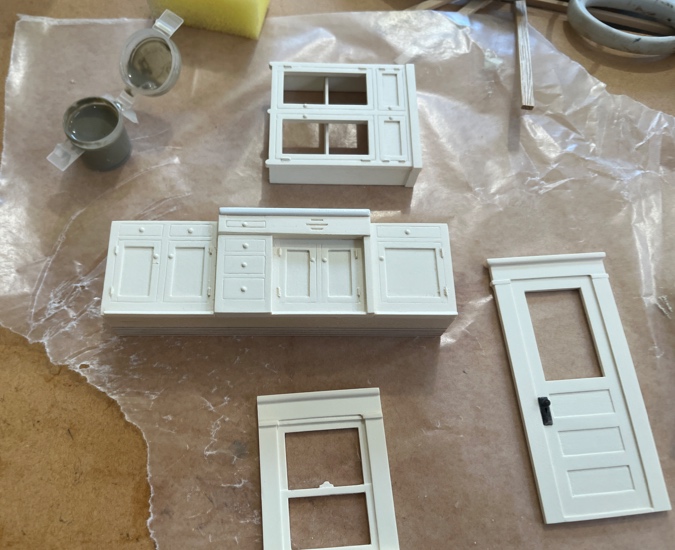
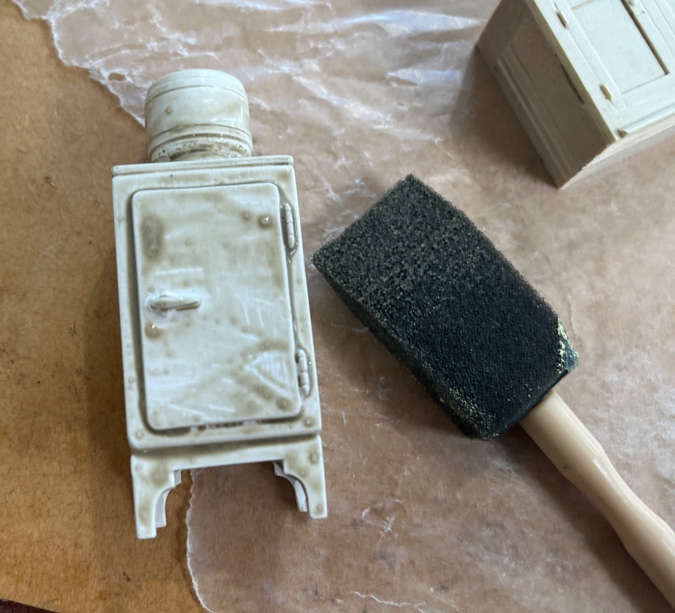
The next step is to apply glaze to the resin cast cabinets, window, and door. I’m not sure what this stuff is, but it’s like a gray wash.
I used a sponge brush to spread glaze over the cabinets. It pools in the cracks, at the edges of the door panels, and around the hinges.
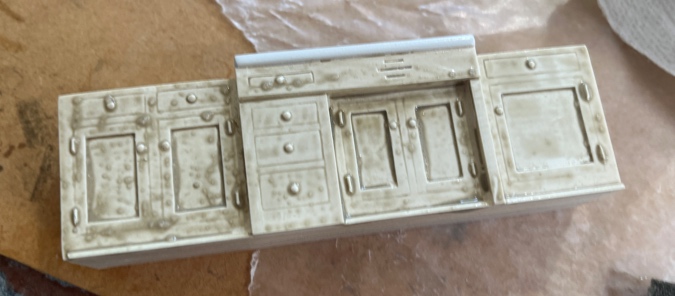
Then I dabbed it off with a paper towel.
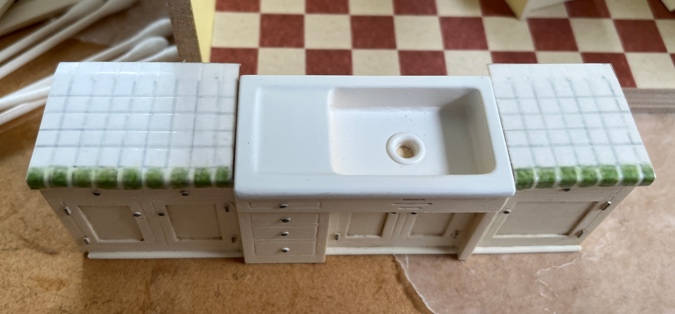
And finally I used a damp paper towel to get the glaze off the flat parts. Here you can see an unglazed cabinet on the left and a glazed cabinet on the right. The difference is subtle, but the glaze adds a little bit of grime and brings out the details.
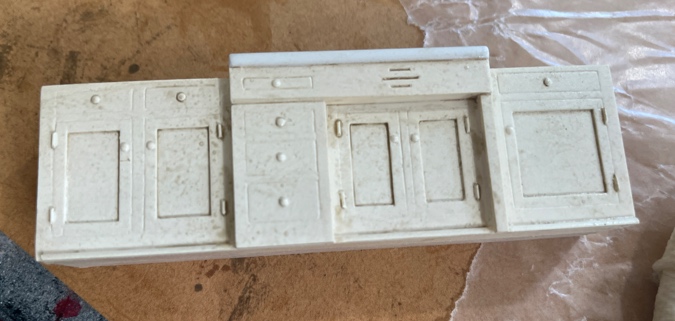
I felt like the details weren’t popping enough and repeated the process three or four times on each piece. I had some glaze left over so I decided to do it on the fridge too.
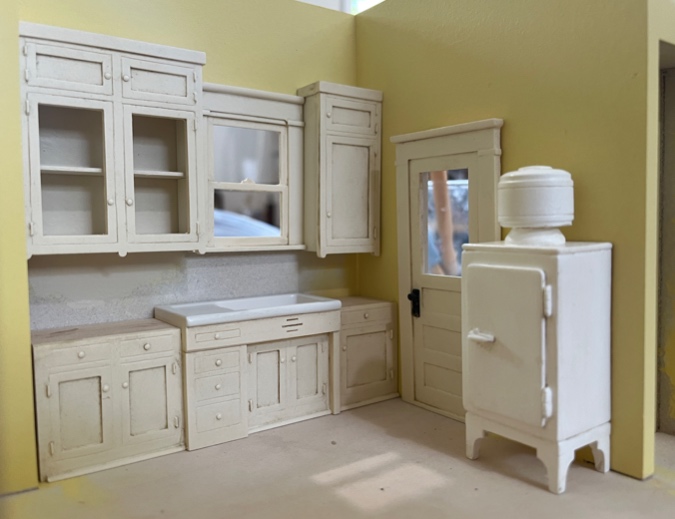
Here are my glazed pieces in place. I might have overdone it — they look pretty grimy! But white kitchen cabinets do have a tendency to get this way…
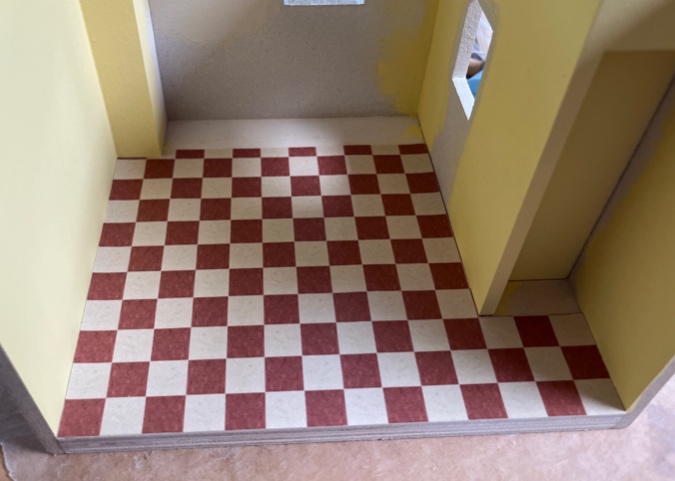
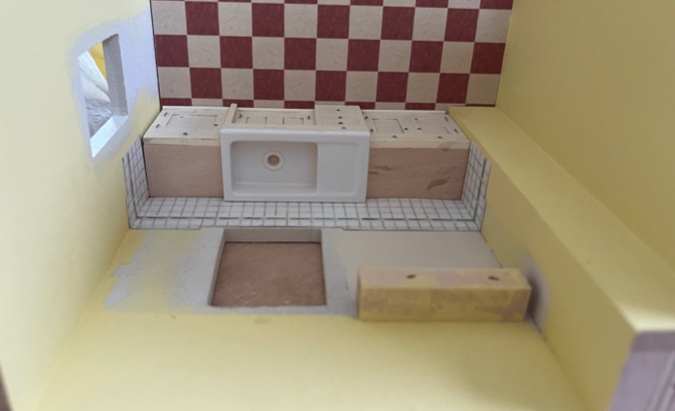
The next step was to glue down the flooring. This was much quicker than my hand-laid floor in the Mansard Victorian.
And then I tackled the countertops and backsplash. The kit came with these pieces taped down on a piece of MDF. They’re paper, and the packing tape covering the paper adds a glossy sheen. You’re supposed to use a ball stylus to score the grout lines, but I don’t have one, so I used a size 22 tapestry needle. In this picture, the long backsplash piece have been scored and the others haven’t yet.

After I finished scoring all the pieces, I used an Xacto knife to cut the countertop pieces off the MDF. The instructions said to glue the edge of the tile pieces to the front edge of the countertop pieces and leave them alone to dry.
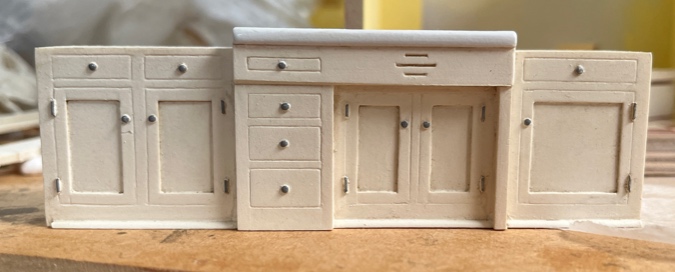
While those were drying, I used a Molotow Liquid Chrome Marker to paint the knobs and hinges. In this picture you can see a dot of silver outside of the knob under the sink. This and other mistakes were easily cleaned up with a little bit of lacquer thinner on a Q-Tip. I didn’t know that would work and was glad to learn that trick.
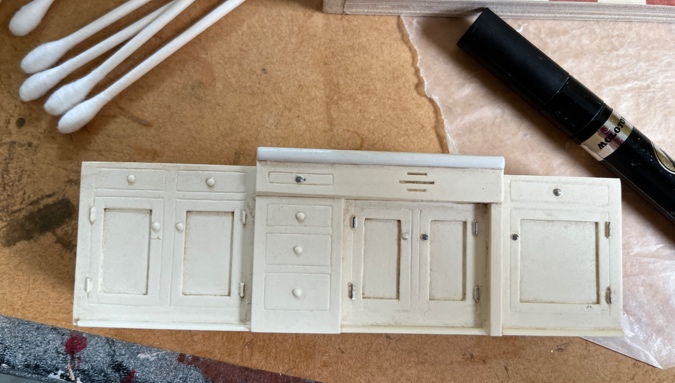
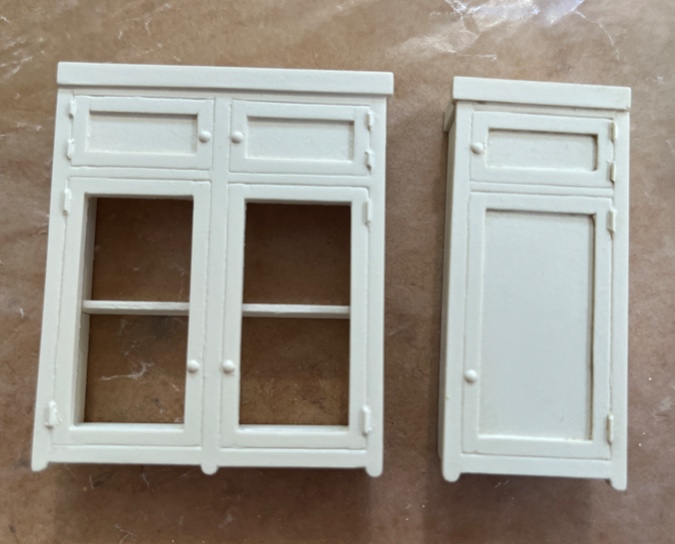
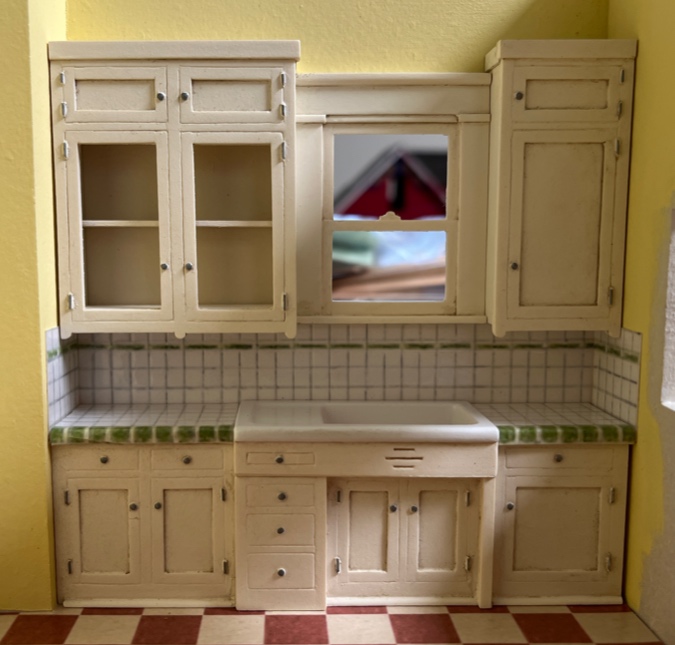
Here’s the finished cabinet. On the first cabinet door on the left, there’s a little imperfection under the knob — it came that way and isn’t something I can fix. I’m trying not to stare at it.
Back to the countertops. The instructions said to score the paper with the dull edge of an Xacto blade before folding. I did that, but the paper still peeled in half when I folded it. It happened on both pieces. I added more glue under the peeled-up part, squished it down hard with my fingers, and left the pieces to dry again.
When that glue had dried, I scored the paper again, this time with the sharp edge of the blade, and carefully folded down and glued the top part. The front edges seem like they’ll stay put but I’m a little worried they could peel up again. The cabinet will be glued into the roombox, but I decided not to glue the countertop pieces, so I’ll be able to remove them if I ever need to make a repair.

The scored tiles don’t have quite as much definition as I’d like, but this is a decent alternative to the “one tile at a time” method I’ve been doing (for example, on the Mansard Victorian’s countertop), and obviously way quicker. (After taking these pics, I cut off the excess paper at the back of the countertop pieces.)
The next step was to lay the room on its back and reach in from the ceiling to glue in the lower cabinets and backsplash pieces.
Then I glued in the right upper cabinet. The one on the left is removable and has an open back, so you can fill the shelves. (It also has a piece of plexiglass that I haven’t inserted yet.) The cabinets are holding the window trim in place for now.
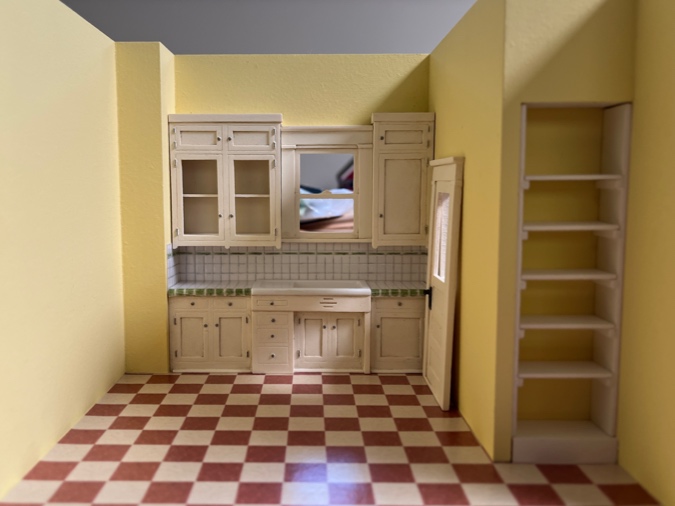
And that’s where I left off.
Since I’m using all the materials that came with the kit, my finished Momma’s Kitchen will look similar to a lot of other Momma’s Kitchens out there, but I want to share this variation done by Kim Chaplin. Kim owned The Miniature Scene, a Bay Area store where the Guys from Texas taught a Momma’s Kitchen class back in 2006.
Kim’s kitchen has blue walls, and she painted the knob at the top of the flour canister blue to match. It’s normally red, the same color as “Flour” stenciled on the front.
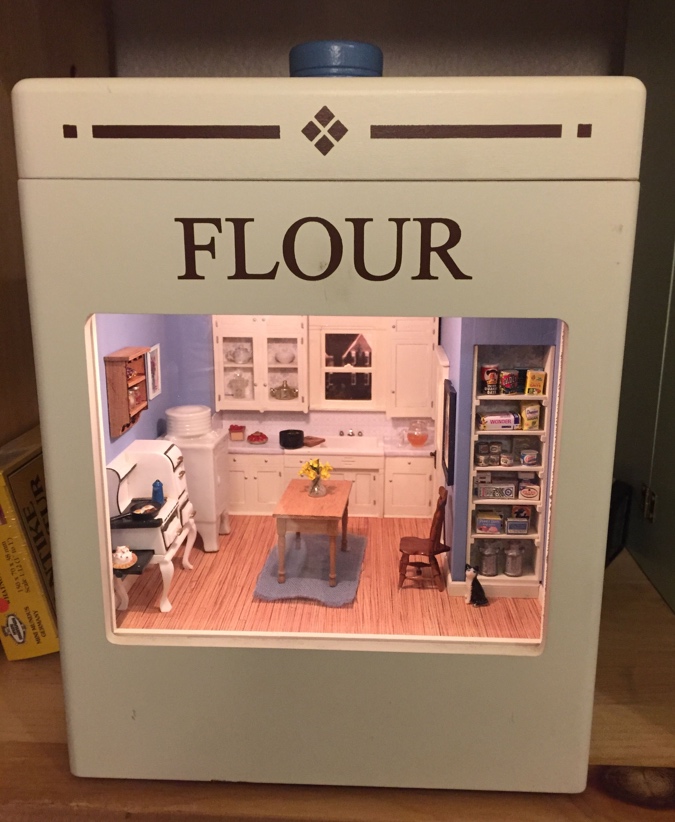
She also used hardwood flooring. The wall color and flooring really change the look and give the kitchen a warmer feel.
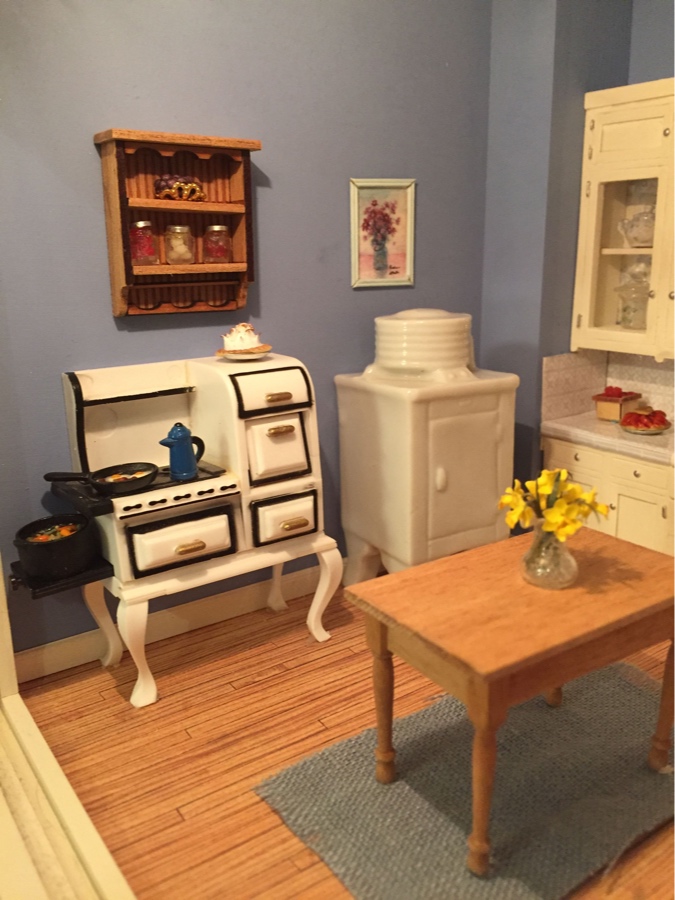
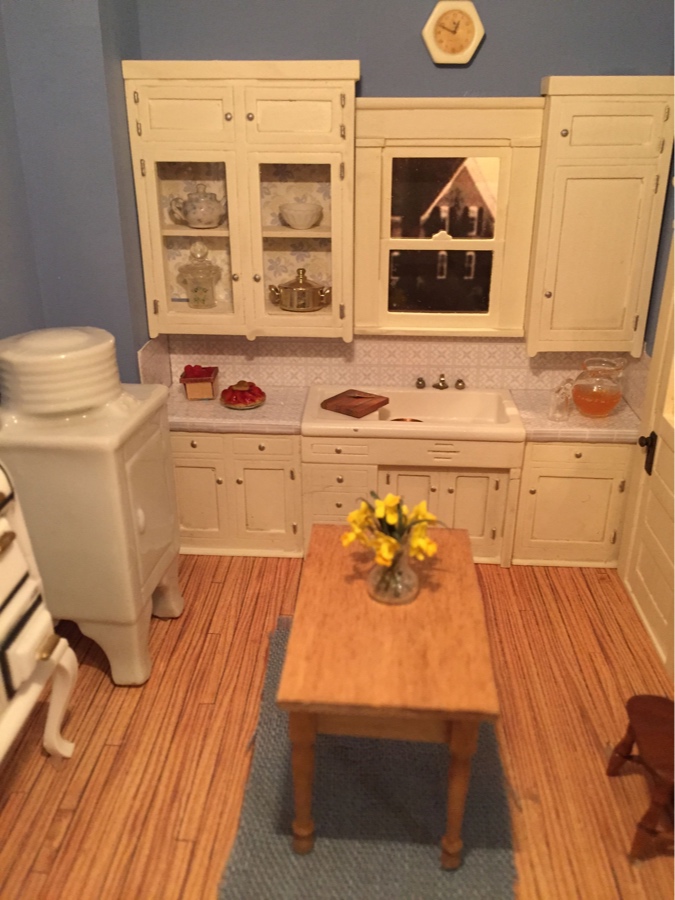
She used different tile as well, and added floral wallpaper behind the glass cabinet. I think her cabinets are less grimy than mine!
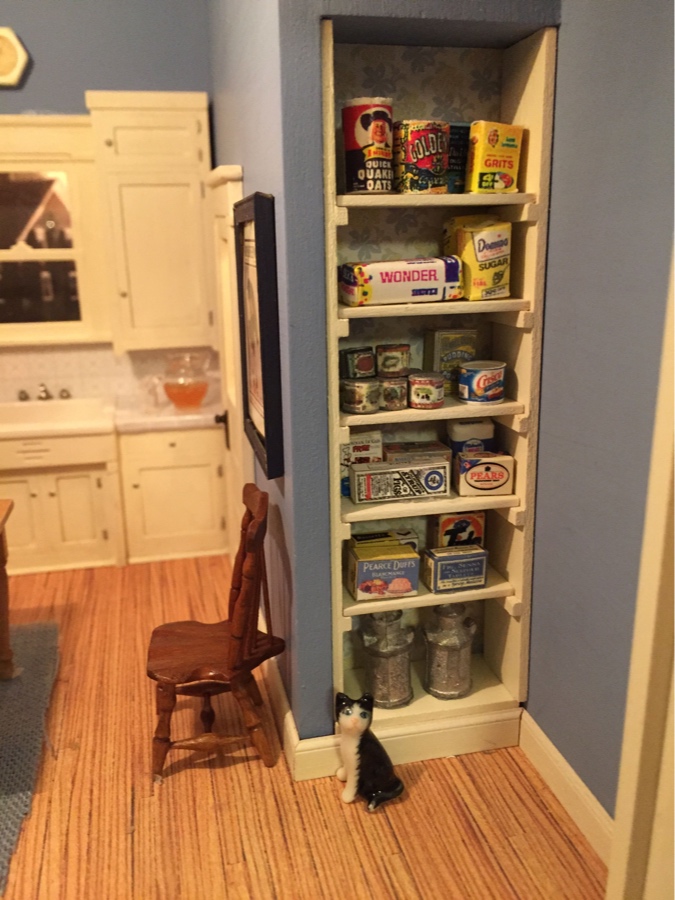
The back of the pantry also has the floral wallpaper. She did a great job filling the shelves with pantry items.
 Emily is a freelance writer, miniaturist, and adventure game enthusiast.


When Mom and I took a class in Maine to make bent birch chairs, we learned that the human eye scans from left-to-right (at least in the western world.) So we were told that any imperfections or variations on the left side of the chairs would be more noticeable and that we should work from right-to-left so we would be more practiced when we got to the left side.
I like that he window in Kim’s kitchen has a scene (as yours does in your, I think, Christmas box), but her neighbor’s houtse seems too close and at a strange angle.
That’s interesting! I did start on the right, but it might have been so my left hand could hold the cabinet without being on top of wet ink. I didn’t think about it, that just seemed like the way to do it.
The scene outside the window in Kim’s roombox came with the kit. I’m planning to replace it. I was thinking either a view outside the window of my house with the oleanders blooming, or I’d ask you to send me some pics of Lewis St. (but not snowy like the ones I used in the Christmas roombox).
I only remember these canisters from an old miniature magazine. I bet that was a great class to take! I hope you can find the other pieces.
Wonderful progress and projects…thank you for sharing so much detail work!
I definitely enjoy seeing the variations of this kitchen. The yellow I feel makes it look warmer as blue is a cool tone. Your fridge looks more realistic as Kim’s has more of a plastic look to it. Also I totally love your countertops! Kim’s wallpaper in the back of the glass cabinets is a great idea, love this! The painted on grim effect that you did is very cool too. So many great ideas here, keep it coming!!! Thanks for taking the time to share.
Everything is so charming! What a lovely kitchen!